Learn How To Clean White Converse Shoes

White Converse shoes are a timeless classic, but maintaining their pristine appearance can be a challenge, especially when faced with inevitable dirt and stains. Fear not, as with the right techniques, you can keep your white Converse looking fresh and vibrant. In this article, we will provide you with a step-by-step guide on how to clean white Converse shoes effectively.

Keeping it Crisp: A Guide on How to Clean White Converse Shoes

Remove Laces and Insoles

Before diving into the cleaning process, remove the shoelaces and insoles from your Converse shoes. This will allow you to clean these components separately and ensure a more thorough cleaning for the entire shoe.

Brush Off Surface Dirt

Use a soft-bristle brush or an old toothbrush to gently brush off any loose dirt or debris from the surface of the shoes. This preliminary step helps prevent rubbing dirt into the fabric during the cleaning process.

Create a Cleaning Solution

Mix a small amount of mild detergent or liquid soap with warm water to create a soapy solution. Avoid using harsh chemicals, as they may damage the fabric or rubber of your Converse shoes.

Spot Clean Stains

Dip a soft cloth or the bristles of a toothbrush into the soapy solution, and gently scrub any visible stains or areas with discoloration. Focus on stained regions, such as scuff marks or mud spots, and work the cleaning solution into the fabric.

Clean Laces and Insoles

Soak the laces in the soapy solution or consider replacing them if they are heavily stained. Clean the insoles separately by gently scrubbing them with a brush or cloth. Allow both the laces and insoles to air dry completely before reattaching them to the shoes.

Machine Wash (optional)

If your Converse shoes are machine-washable, you can place them in a pillowcase or mesh laundry bag to protect them during the wash. Use a gentle cycle with cold water and avoid using bleach. Air dry the shoes afterward to maintain their integrity.

Whiten the Rubber Soles

For the rubber soles, create a paste using baking soda and water. Apply the paste to the rubber portions of the shoes, scrubbing gently with a brush. Allow it to sit for a few minutes before rinsing off the paste.

Air Dry Properly

After cleaning, allow your Converse shoes to air dry naturally. Avoid exposing them to direct sunlight or using artificial heat sources like hair dryers, as this can cause the fabric and rubber to deteriorate.

FAQs

Can I clean my white Converse shoes in a washing machine?

Yes, you can clean your white Converse shoes in a washing machine. Place them in a pillowcase or mesh laundry bag to protect them during the wash. Use a gentle cycle with cold water and avoid using bleach. Air dry the shoes afterward to maintain their integrity.

What’s the best way to remove stains from white Converse shoes?

For stain removal, create a soapy solution using mild detergent or liquid soap with warm water. Dip a soft cloth or toothbrush into the solution and gently scrub the stained areas. For rubber soles, a paste made from baking soda and water can be used to whiten and remove stains.

Is it necessary to remove the laces and insoles when cleaning white Converse shoes?

Yes, it’s recommended to remove the laces and insoles before cleaning white Converse shoes. This ensures a more thorough cleaning for the entire shoe. Clean the laces separately by soaking them in the soapy solution, and gently scrub the insoles to maintain the overall freshness of your sneakers.

Final Thought

With a bit of care and attention, you can keep your white Converse shoes looking as crisp and clean as the day you bought them. Regular cleaning, spot treatments for stains, and proper drying techniques will ensure that your iconic white sneakers remain a stylish and timeless accessory for any outfit. Keep these steps in mind, and your Converse shoes will continue to make a bold and fresh statement with every step.


Unleash the Power of Klean Strip Paint Sprayer Cleaner

Revolutionize your painting experience with the incredible Klean Strip Paint Sprayer Cleaner. If you’re tired of struggling with clogged paint sprayers, wasted time, and subpar cleaning methods, then look no further. In this article, we’ll delve into the amazing features of Klean Strip Paint Sprayer Cleaner and explore why it has become a game-changer for both professional painters and DIY enthusiasts alike.

The Perfect Cleaning Solution for Paint Sprayers

Maintaining a paint sprayer is crucial for achieving flawless painting results, and Klean Strip Paint Sprayer Cleaner offers the perfect solution. With its powerful formulation, this cleaner is specially designed to remove stubborn paint residues, clogs, and contaminants from your paint sprayer. It ensures a clean and efficient paint flow, preventing blockages and reducing downtime during your projects.

Quick and Efficient Cleaning Process

Gone are the days of spending hours scrubbing and scraping to clean your paint sprayer. Klean Strip Paint Sprayer Cleaner simplifies the cleaning process, saving you valuable time and effort. Its advanced formula effortlessly dissolves dried paint and clears residue build-up in no time. Simply follow the instructions, and you’ll have your paint sprayer ready for the next project in a matter of minutes.

Versatile Application

Whether you’re using an airless, HVLP, or any other type of paint sprayer, Klean Strip Paint Sprayer Cleaner is compatible with all models. Its versatility allows it to effectively clean various types of paint, including oil-based, latex, and enamels. No matter the type of paint you’re using, this cleaner ensures a pristine and well-maintained paint sprayer every time.

Environmentally Friendly

Klean Strip Paint Sprayer Cleaner not only delivers exceptional cleaning performance but also prioritizes environmental sustainability. It is formulated to be low in VOCs (volatile organic compounds) and contains no harmful chemicals like methylene chloride. This eco-friendly cleaner is safe to use, ensuring a healthier work environment for you and your colleagues.

Extends the Lifespan of Your Paint Sprayer

Regularly cleaning your paint sprayer with Klean Strip Paint Sprayer Cleaner helps extend its lifespan and maintain its optimal performance. By preventing the build-up of paint residues and contaminants, you’ll avoid costly repairs or the need for premature replacement. With this cleaner, you’ll get the most out of your paint sprayer investment, ensuring consistent, high-quality results for years to come.

Convenient Packaging Options

Klean Strip understands the diverse needs of painters, which is why they offer their Paint Sprayer Cleaner in various packaging options. From small bottles for occasional use to larger containers for professional projects, you can choose the size that suits your requirements. This flexibility ensures you always have the right amount of cleaner on hand, without wastage.

FAQs

How does Klean Strip Paint Sprayer Cleaner work?

Klean Strip Paint Sprayer Cleaner is formulated with powerful cleaning agents that effectively dissolve dried paint and remove residue build-up in paint sprayers. It works by breaking down and loosening the paint particles, allowing for easy removal. Simply follow the instructions on the packaging to properly use the cleaner and restore your paint sprayer to its optimal condition.

Is Klean Strip Paint Sprayer Cleaner safe to use?

Yes, Klean Strip Paint Sprayer Cleaner is designed to be safe for use. It is formulated to be low in VOCs (volatile organic compounds) and does not contain harmful chemicals like methylene chloride. This makes it a suitable choice for both professional painters and DIY enthusiasts. However, it’s always important to follow the safety guidelines provided on the product label, such as wearing protective gloves and ensuring proper ventilation during use.

Can Klean Strip Paint Sprayer Cleaner be used with different types of paint sprayers and paints?

Absolutely! Klean Strip Paint Sprayer Cleaner is compatible with various types of paint sprayers, including airless, HVLP, and others. It is also effective in cleaning different types of paint, such as oil-based, latex, enamels, and more. Whether you’re using a professional-grade sprayer or a smaller DIY model, you can rely on Klean Strip Paint Sprayer Cleaner to remove paint residues and maintain the performance of your equipment.

Conclusion

Klean Strip Paint Sprayer Cleaner has revolutionized the way painters clean and maintain their paint sprayers. With its powerful formula, quick cleaning process, and versatility, this cleaner offers an unbeatable solution for achieving spotless results. Say goodbye to clogged sprayers and inefficient cleaning methods. Embrace the power of Klean Strip Paint Sprayer Cleaner and take your painting projects to new heights of perfection.

How to Kill Flies in House Plants

House plants can bring a lot of life and color to any home, but unfortunately, they can also attract pesky flies. These small flies can be a nuisance, but thankfully, there are ways to get rid of them without harming your plants. In this article, we’ll explore some effective methods for getting rid of flies in your house plants.

How to Kill Flies in House Plants

Identifying the Flies

Before you start trying to get rid of the flies, it’s important to identify what kind of flies they are. Fungus gnats are a common type of fly that can infest house plants. These tiny flies are attracted to the moist soil in your plants and lay their eggs there. Once the eggs hatch, the larvae feed on the roots of your plants, which can damage or even kill them.

Sticky Traps

One effective method for getting rid of flies in your house plants is by using sticky traps. These traps are essentially just small pieces of paper or plastic coated with a sticky substance that attracts flies. You can find sticky traps at most gardening stores, or you can make your own by coating a piece of yellow paper with honey or petroleum jelly.To use a sticky trap, simply place it near your plants. The flies will be attracted to the trap and get stuck in the sticky substance, which will prevent them from breeding and laying more eggs in your soil.

Drying Out the Soil

Since fungus gnats are attracted to moist soil, one way to get rid of them is by drying out the soil in your plants. This can be done by reducing the frequency of your watering or by switching to a soil mix that drains better.If you do decide to dry out your soil, make sure you’re not overdoing it. Your plants still need water to survive, so be sure to check the soil moisture regularly and water your plants as needed.

Neem Oil

Neem oil is a natural insecticide that can be effective at getting rid of flies in your house plants. To use neem oil, dilute it with water according to the instructions on the bottle and spray it on the soil of your plants. The neem oil will repel the flies and prevent them from breeding in your soil.You can also use neem oil as a foliar spray to get rid of any flies that may be living on your plant’s leaves. Simply dilute the neem oil with water and spray it on the leaves of your plants.

FAQs

How do I know if I have flies in my house plants?

If you notice small flying insects around your plants, it’s likely that you have flies. Fungus gnats are a common type of fly that infests house plants. They are attracted to the moist soil in your plants and lay their eggs there. Once the eggs hatch, the larvae feed on the roots of your plants, which can damage or even kill them.

What’s the best way to get rid of flies in my house plants?

There are a few effective methods for getting rid of flies in your house plants. One way is to use sticky traps, which are coated with a sticky substance that attracts flies. Another way is to dry out the soil in your plants by reducing watering or switching to a soil mix that drains better. Neem oil is also a natural insecticide that can be effective at repelling flies and preventing them from breeding in your soil.

Are there any harmful chemicals I should avoid when trying to kill flies in my house plants?

Yes, it’s important to avoid using harmful chemicals when trying to get rid of flies in your house plants. Pesticides and insecticides can be harmful to your plants and can also be toxic to pets and humans. Instead, opt for natural solutions like sticky traps, drying out the soil, and neem oil. These methods are effective at getting rid of flies without causing harm to your plants or the environment.

Conclusion

Flies in house plants can be a nuisance, but they can be effectively dealt with using the methods described above. Sticky traps, drying out the soil, and neem oil are all effective ways to get rid of flies in your house plants without harming your plants. By taking action to get rid of these pests, you can help ensure that your house plants stay healthy and beautiful.

How To Wash Herschel Backpack?

Herschel backpacks are popular choices for school, work, and travel because of their durability and stylish designs. However, like any other item that we use regularly, Herschel backpacks can get dirty and may need to be washed from time to time.

If you’re wondering how to wash a Herschel backpack, here are some steps you can follow:

Check the care instructions:

Before you start washing your Herschel backpack, it’s important to check the care instructions first. These instructions can usually be found on a tag inside the backpack or on the Herschel website. Some backpacks may be machine washable, while others may need to be hand washed or dry cleaned. Make sure to follow the specific instructions for your backpack to avoid damaging it.

Remove all items from the backpack:

Take out all the items that are inside your Herschel backpack. This includes any loose items, as well as any removable liners or pockets.

Vacuum or brush the backpack:

Use a vacuum or a soft brush to remove any dirt, dust, or debris that may be stuck on the surface of the backpack. This will help to loosen any dirt or stains that may be difficult to remove.

Pre-treat any stains:

If your Herschel backpack has any noticeable stains, it’s a good idea to pre-treat them before washing. You can use a stain remover or a mixture of equal parts water and vinegar to gently dab the stain. Let the solution sit for a few minutes before proceeding to the next step.

Wash the backpack:

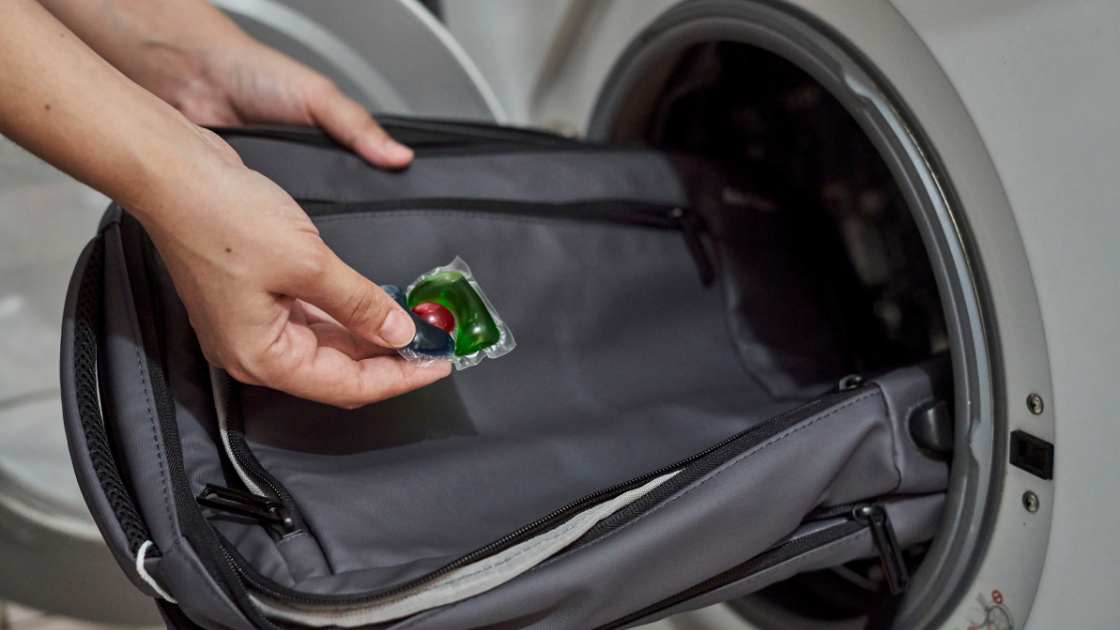
If your Herschel backpack is machine washable, you can wash it in the washing machine using a gentle cycle and cold water. If it’s not machine washable, you’ll need to hand wash it using a mild detergent and cold water. Make sure to gently scrub any stains or dirty areas and rinse the backpack thoroughly.

Dry the backpack:

After washing, it’s important to let your Herschel backpack dry completely before using it again. You can either hang it up to air dry or use a low heat setting on your dryer. Be sure not to use a high heat setting, as this can shrink or damage the backpack.

By following these steps, you can effectively clean your Herschel backpack and keep it looking and smelling fresh. Just be sure to always follow the care instructions provided by the manufacturer to avoid damaging your backpack.

Can I machine wash my Herschel backpack?

It depends on the specific model of your Herschel backpack. Some models are machine washable, while others are not. To find out whether your Herschel backpack is machine washable, you can check the care instructions provided by the manufacturer. These instructions can usually be found on a tag inside the backpack or on the Herschel website. If your backpack is machine washable, be sure to use a gentle cycle and cold water to avoid damaging it.

Can I use bleach to clean my Herschel backpack?

It’s generally not recommended to use bleach to clean a Herschel backpack. Bleach can be harsh and may cause discoloration or damage to the backpack’s fabric. Instead, use a mild detergent or a mixture of equal parts water and vinegar to gently scrub any stains or dirty areas. If you need to remove tough stains, you can try using a stain remover specifically designed for use on fabric. Just be sure to test the stain remover on a small, inconspicuous area of the backpack before using it on the entire surface to make sure it doesn’t cause any discoloration or damage.

Final Thoughts

In conclusion, it’s important to take good care of your Herschel backpack to keep it looking and functioning its best. By following the care instructions provided by the manufacturer and using gentle cleaning methods, you can effectively clean and maintain your Herschel backpack. Whether you need to remove stains or just give it a general cleaning, these steps can help you keep your Herschel backpack looking and smelling fresh. Just be sure to use caution and care when cleaning your backpack to avoid damaging it and ensure that it lasts for as long as possible.

How to get bike grease out of clothes? Easy Guide

Bike grease can be difficult to remove from clothes, but with the right techniques and products, it is possible to successfully get rid of these stubborn stains. In this article, we will provide step-by-step instructions for removing bike grease from clothes, including tips for different types of fabrics and stains. We will also discuss the importance of treating stains promptly and provide some helpful tips for preventing bike grease stains in the future. By following these guidelines, you can keep your clothes looking clean and fresh, even after working on your bike.

Can grease stains be removed from clothes?

Yes, grease stains can typically be removed from clothes. However, the success of the stain removal will depend on the type of grease, the fabric of the clothing, and how long the stain has been allowed to be set. In general, the sooner you treat a grease stain, the better your chances of removing it completely.

To remove bike grease from clothes, try the following steps:

  • Gently scrape off any excess grease with a dull knife or spoon.
  • Apply a pre-wash stain remover or a liquid laundry detergent directly to the stain.
  • Rub the stain with a soft cloth or brush to work the cleaner into the fabric.
  • Let the stain soak for at least 15 minutes, or longer if necessary.
  • Rinse the stain with cold water to remove the cleaner and any loosened grease.
  • Wash the item of clothing in the hottest water recommended for the fabric, using a laundry detergent and an oxygen-based bleach.
  • If the stain persists, repeat steps 2-6, or take the item to a professional cleaner for additional treatment.

Remember to always check the care instructions on the clothing label before attempting to remove a stain. Some fabrics may be sensitive to certain cleaners or high heat and could be damaged if not treated carefully.

You may also need:  How to Wash Christmas Sweater with Lights without Ruining Them

Does WD-40 remove oil stains from clothes?

WD-40 is a versatile cleaner and lubricant that can be used to remove oil stains from clothes in some cases. To use WD-40 to remove an oil stain, follow these steps:

  • Gently scrape off any excess oil with a dull knife or spoon.
  • Spray the stain with WD-40, making sure to cover the entire stain.
  • Rub the stain with a soft cloth or brush to work the WD-40 into the fabric.
  • Let the WD-40 soak into the stain for at least 15 minutes, or longer if necessary.
  • Rinse the stain with cold water to remove the WD-40 and any loosened oil.
  • Wash the item of clothing in the hottest water recommended for the fabric, using a laundry detergent and an oxygen-based bleach.
  • If the stain persists, repeat steps 2-6, or take the item to a professional cleaner for additional treatment.

Remember to always test WD-40 on a small, inconspicuous area of the clothing first to make sure it does not cause any damage or discoloration. Some fabrics may be sensitive to certain cleaners or high heat, and could be damaged if not treated carefully.

Final Thoughts

In conclusion, removing bike grease from clothes can be challenging, but with the right techniques and products, it is possible to successfully get rid of these stubborn stains. By following the steps outlined in this article, you can effectively remove bike grease from a variety of fabrics, including cotton, polyester, and other common materials. Additionally, treating stains promptly and taking preventative measures can help you keep your clothes looking clean and fresh, even after working on your bike. By using these tips and tricks, you can keep your clothes looking their best and enjoy your biking adventures without worrying about grease stains.

How to Wash Christmas Sweater with Lights without Ruining Them

Christmas is a time to gather with family and friends to celebrate. One of the customs is to exchange Christmas sweaters. Many individuals treasure this item and retain it for many years.

However, if your sweater has lights on it, it must be hand cleaned by someone who understands how to do it properly in order for the lights to remain visible. If you read the post, you will learn how to wash a Christmas sweater with lights.

What is a Christmas sweater with lights, and why should you care about how to wash it?

Exchanging gifts is one of the most popular Christmas customs. A Christmas sweater with lights is one of the most popular presents to offer throughout the holiday season.

While many people like wearing these sweaters, many are unaware of how to wash them correctly to keep them looking their best. When shopping for a Christmas sweater with lights, consider the materials utilized to make the garment.

The bulk of Christmas sweaters are made of wool, which is tough to maintain. Wool is inherently strong and resistant to liquids, but it also readily absorbs moisture. If you intend to wear your Christmas sweater frequently, it is essential to follow correct cleaning guidelines to keep it looking its best for years to come.

How do you wash Christmas sweaters?

Christmas sweaters are a popular holiday clothing item. They may be worn both indoors and outside and are ideal for keeping people warm. However, if not properly washed, they may get filthy rapidly. Depending on the type of sweater and how unclean it is, there are several ways to wash Christmas sweaters. Here are some pointers:

  • Hand wash in cool water with a mild soap if the sweater is knit. To avoid creases, gently squeeze out the water and hang or lay the sweater to dry.
  • If the sweater is acrylic or nylon, machine wash in cold water with a moderate detergent and spin dry low. Fabric softeners and bleach should not be used since they will harm the sweater.

Can you wash a Christmas sweater in the washing machine?

Is washing a Christmas jumper in the washing machine safe? Some experts believe it is OK to machine-wash your holiday attire in lukewarm water on a moderate cycle. However, do not wring the item out or use a strong spin cycle since these acts may cause fabric damage. Hand-washing this item may also be preferable if you can handle it without destroying it.

How do you wash light up clothes?

Washing light up Christmas clothes can be a challenge. Follow these tips to make the process easier:

  • Start by sorting the clothes by color. Whites should go in one load, pinks in another, etc.
  • Use a gentle detergent and cold water.
  • Don’t use fabric softener or bleach.
  • Hang the clothes to dry.

How often do sweaters need to be washed?

Sweaters are one of the most commonly used articles of apparel. They are frequently used in chilly weather and are readily soiled. Unless your sweater is filthy, the rule of thumb for washing sweaters is every 2-5 wears. If you want to use your sweater more than once a week, it is preferable to wash it after each use.

Tips for keeping your Christmas sweater with lights looking new

Christmas is a season of giving, and what better way to offer than with a beautiful Christmas sweater? If you don’t want your sweater to seem worn out, here are some suggestions for keeping your Christmas sweater with lights looking new.

  • Check that the lights are in excellent working order. It will be tough to maintain the sweater looking new if they stop operating correctly or begin to break out.
  • Keep the lights clean on a regular basis. If dust collects on the lights, they will become less effective and may eventually need to be replaced.
  • Avoid wearing the sweater all the time. If you just wear your Christmas sweater once or twice a year, it will last considerably longer and will not need to be washed as frequently.

What is the best detergent to wash sweaters in?

If you use the wrong detergent, your sweaters will come out clumpy and full of dirt and lint. To avoid damaging your sweaters, use a soft detergent, such as Tide. Here are three safe detergents for cleaning sweaters:

Tide – A well-known, mild all-purpose detergent that may be used on a wide range of materials.

Lysol is a home cleanser that is excellent for cleaning surfaces and garments.

Pine-sol – A natural cleanser derived from pine trees that is excellent for eliminating oils and grease.

In Final Words

Give your Christmas sweater a little wash to keep it looking fresh! Not only will this make the colors appear brighter and more brilliant, but it will also keep you warm on those chilly winter days. So go ahead and get organized for those Christmas festivities, as well as tidy up your sweater.