You pull your board out of the car, and there it is: a fresh crack in the rail, its edges whitened and slightly crushed. It’s a small wound, but you know the rules — left alone, it will drink seawater, delaminate, and turn a twenty-minute job into a major repair. Fortunately, fixing foam and composite gear is a skill you can learn in an afternoon, and most dings never require a professional. But the process changes depending on whether you’re patching soft foam or a hard fiberglass shell, and getting that distinction right is the difference between a repair that holds and one that fails at the worst moment. This guide walks through exactly how to fix a surfboard or any similar foam-core composite item, from damage assessment to the final sand and seal.
Quick Answer
Match your repair to the material. For soft foam (bodyboards, foamies), dry the damaged area completely, fill deep gouges with a flexible foam-safe compound or a heat-fused foam patch, then seal the surface to keep water out. For hard composites (fiberglass or epoxy over foam), cut away loose material, let the foam dry, fill the void with resin mixed with filler or a foam plug, lay fiberglass cloth over the area, saturate it with resin, and sand it flush once cured. Always dry before you seal — trapped moisture causes the repair to fail from the inside.
Key Takeaways
- Material matters more than damage size: soft foam needs flexible patching, while hard composite needs resin and cloth, and mixing up the two is the most common repair mistake.
- Water is the real enemy — a ding that stays wet will delaminate the foam beneath even if the surface looks sealed.
- Damage that reaches the foam core must be dried and filled before you cover it; surface-only cracks can often be sealed directly.
- Matching resin type to the original build (polyester vs. epoxy) is critical, because the wrong resin can melt the foam core.
- A repair that feels proud or lumpy will affect how the gear handles, so sanding flush is a functional step, not just cosmetic.
Identify the Material Before You Touch Anything
The correct repair depends entirely on what the surface actually is, so identify it first. Foam gear — bodyboards, soft-top surfboards, and closed-cell foam padding — has a spongy or rubbery skin and a flexible core. Composite gear has a hard, rigid shell (fiberglass, epoxy, or carbon layup) over a foam core. Press a fingernail into it: if it flexes, it’s foam; if it resists hard and maybe clicks, it’s composite. This single test decides your tools, your materials, and your timeline.
Soft Foam Surfaces
Soft foam repairs rely on adhesives and patching compounds that stay flexible, because rigid fills crack and fall out as the foam flexes. Deep gouges get filled with a foam-safe compound or a heat-bonded patch, while shallow surface tears can often be sealed with a flexible repair tape or a smear of foam cement. The goal is a watertight, pliable seal that moves with the material.
Hard Composite Shells
Composite repairs are structural: you replace both the missing shell and, if needed, the foam beneath it. This means fiberglass cloth and the correct resin, layered so the patch bonds to the surrounding shell and restores rigidity. Small surface cracks may only need resin and filler, but dings that break through to the core need a full cloth-and-resin patch.
Assess the Damage Honestly
Not every ding is a DIY job, and knowing when to hand it off saves you from making things worse. Check three things: depth, moisture, and structural impact.
- Surface cracks and scuffs: The shell is scratched or hairline-cracked but intact. Usually a seal-only repair.
- Dings into the foam: The shell is broken and the core is exposed. Requires drying, filling, and a layered patch.
- Compression dents and delamination: The area feels soft, spongy, or drums when tapped. This signals separated layers and trapped water, which usually exceeds what a beginner should tackle.
If the damage sits near a fin box, a leash plug, or a structural rail edge, or if the shell flexes noticeably around the area, professional repair is the safer call. A poor structural repair can fail under load and cause a much larger break.
Gather the Right Materials
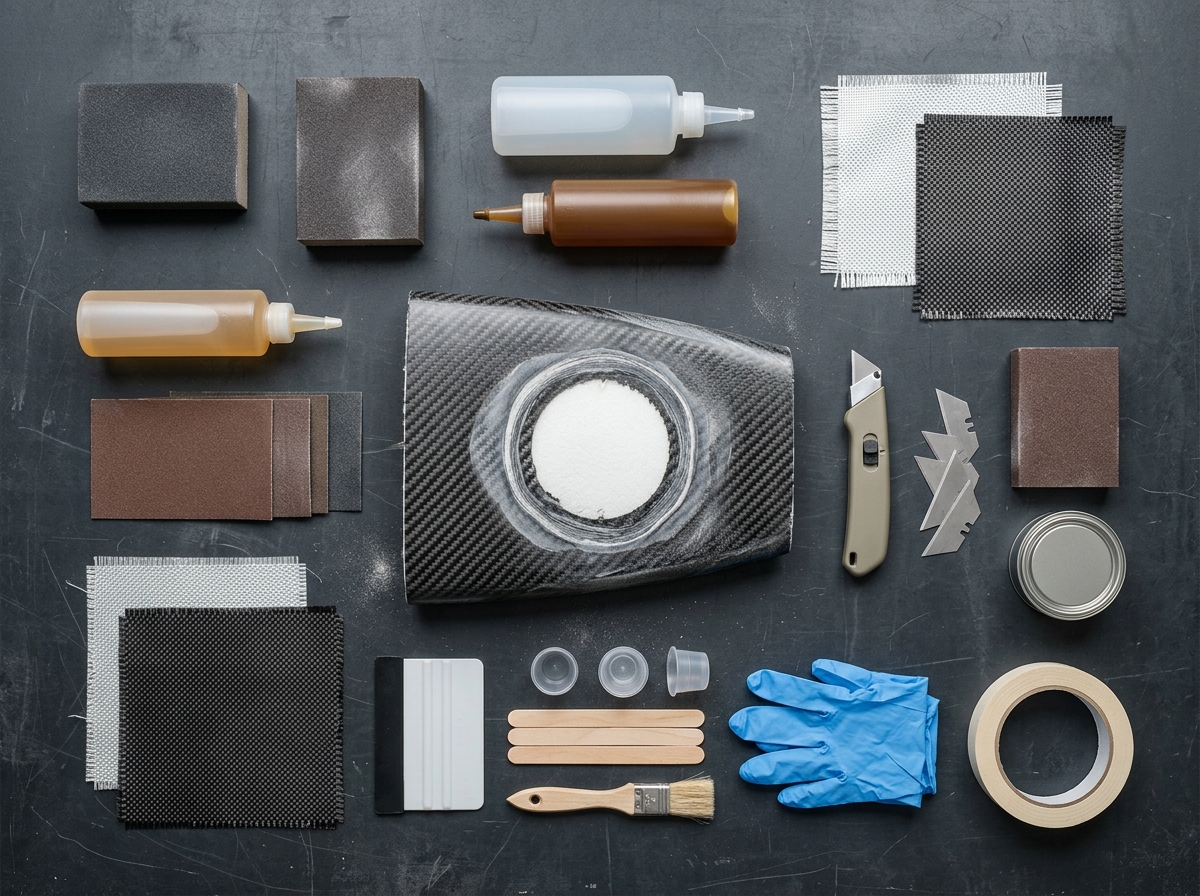
Using the wrong resin or filler is the most common reason repairs fail. For composite work you need fiberglass cloth, resin, a filler powder, sandpaper in a few grits, mixing cups, gloves, and masking tape. The critical choice is resin type.
| Build Type | Shell Material | Resin to Use | Risk of Wrong Choice |
|---|---|---|---|
| Traditional poly board | Polyester resin over polyurethane foam | Polyester resin | Epoxy generally bonds fine, but costlier and trickier to sand |
| Epoxy board | Epoxy resin over EPS foam | Epoxy resin | Polyester resin will dissolve the EPS foam core |
| Soft-top / foamie | Flexible foam skin | Flexible foam cement or patch | Rigid resin cracks and peels as the board flexes |
When in doubt about an epoxy board, use epoxy resin — it bonds to both polyester and epoxy surfaces, and it won’t destroy an EPS core. Polyester resin, by contrast, is cheap and easy to sand but dangerous around EPS foam.
Step-by-Step Composite Repair
This is the core process for hard-shell foam-core gear, and it applies whether you’re patching a surfboard, a paddleboard, or a composite kayak hull.
- Dry the area. Keep the gear out of the water and let the damage air out, ideally for a day or more in a warm, ventilated space. Trapped moisture is what ruins repairs.
- Clean and bevel. Remove loose glass and sand a shallow bevel around the crack so the patch has something to grip. Wipe away dust.
- Fill the void. If the foam is exposed or crushed, fill it with resin mixed with filler powder, or press in a small foam plug, and let it cure. This restores the shape so the cloth lies flat.
- Cut the cloth. Cut fiberglass cloth slightly larger than the damaged area. For larger dings, use two or three progressively larger layers.
- Wet out and lay the patch. Mix resin, saturate the cloth, and press it over the repair. Work out air bubbles with a brush or squeegee.
- Let it cure. Follow the resin’s cure time — usually hours, not minutes. Don’t rush this.
- Sand flush. Once hard, sand the patch level with the surrounding surface, working from coarse to fine grit, then clean off the dust.
- Seal. Apply a thin topcoat of resin or a sealant over the sanded area to restore the watertight surface.
Step-by-Step Soft Foam Repair
Soft foam is more forgiving but needs flexible materials. Clean and dry the area fully. For a deep gouge, fill it with a foam-safe compound and let it set, then trim any excess flush with a sharp blade. For a slice or tear, press the edges together and seal with flexible foam cement or a heat-applied patch. Finish by smoothing the surface so it doesn’t catch water or drag. Avoid rigid glues here — they will crack the moment the foam bends, and the repair will peel away.
Common Mistakes That Cause Repairs to Fail
Most failed repairs trace back to a handful of avoidable errors.
- Sealing over a wet ding. Water trapped under resin keeps eating the foam and eventually pops the patch.
- Using rigid glue on flexible foam. The bond cracks as soon as the material flexes.
- Wrong resin on EPS foam. Polyester resin dissolves the core, turning a small ding into a hollowed-out crater.
- Skipping the filler step. Laying cloth over an unfilled void leaves a weak, hollow patch that flexes and cracks.
- Sanding too aggressively. Over-sanding thins the surrounding shell and weakens the repair zone.
- Not sealing after sanding. A sanded patch is porous and will absorb water unless topcoated.
When to Hand It to a Professional
Some damage is simply beyond a first repair. Delamination across a wide area, damage around fin boxes or leash plugs, cracks that run along a rail or stringer, and any repair involving a hollow or heavily waterlogged core are cases where a pro’s tools and experience save you money in the long run. A bad structural repair doesn’t just look ugly — it can weaken the whole piece and lead to a much bigger failure the next time it takes a hit.
Frequently Asked Questions
Can I repair a ding without fiberglass cloth?
Yes, for surface-only cracks and small chips, resin mixed with filler can seal the damage. But if the shell is broken through to the foam, cloth is needed to restore strength — filler alone is brittle and will crack under flex.
How long do I need to let a ding dry before repairing?
At minimum, 24 hours in a warm, ventilated space, and longer for a deep or waterlogged ding. If the foam still feels damp or smells musty, keep drying. Sealing too early traps moisture and guarantees the repair will fail.
Can I use epoxy resin on a polyester board?
Yes. Epoxy bonds reliably to polyester surfaces and is a safe choice when you’re unsure of the build. It costs more and is harder to sand, but it won’t damage a foam core the way polyester resin can on an EPS board.
Why did my repair crack again after a few sessions?
The most likely causes are trapped moisture, a rigid patch on a flexible surface, or cloth laid over an unfilled void. Any of these creates a bond that flexes and fails. Redo the repair with proper drying and filling.
Can I repair foam gear with regular super glue?
No. Super glue dries hard and brittle, so it cracks as soon as the foam flexes, and it doesn’t fill gaps well. Use flexible foam cement or a foam-safe patching compound instead.
Does a repaired board lose performance?
If the patch is sanded flush and the resin is properly cured, performance loss is minimal. A lumpy or oversized repair adds drag and changes how the board handles, which is why finishing the surface matters as much as the structural fix.
Conclusion
Repairing dings and cracks comes down to three things: knowing your material, drying thoroughly before you seal, and matching your patch to how the surface moves. Composite shells need resin and cloth to restore structure, while soft foam needs flexible compounds that bend without cracking. Catch damage early, work dry, and finish flush, and most repairs will outlast the gear itself. If the damage runs deep or sits near a structural component, hand it to a pro — that’s not giving up, it’s protecting your investment.