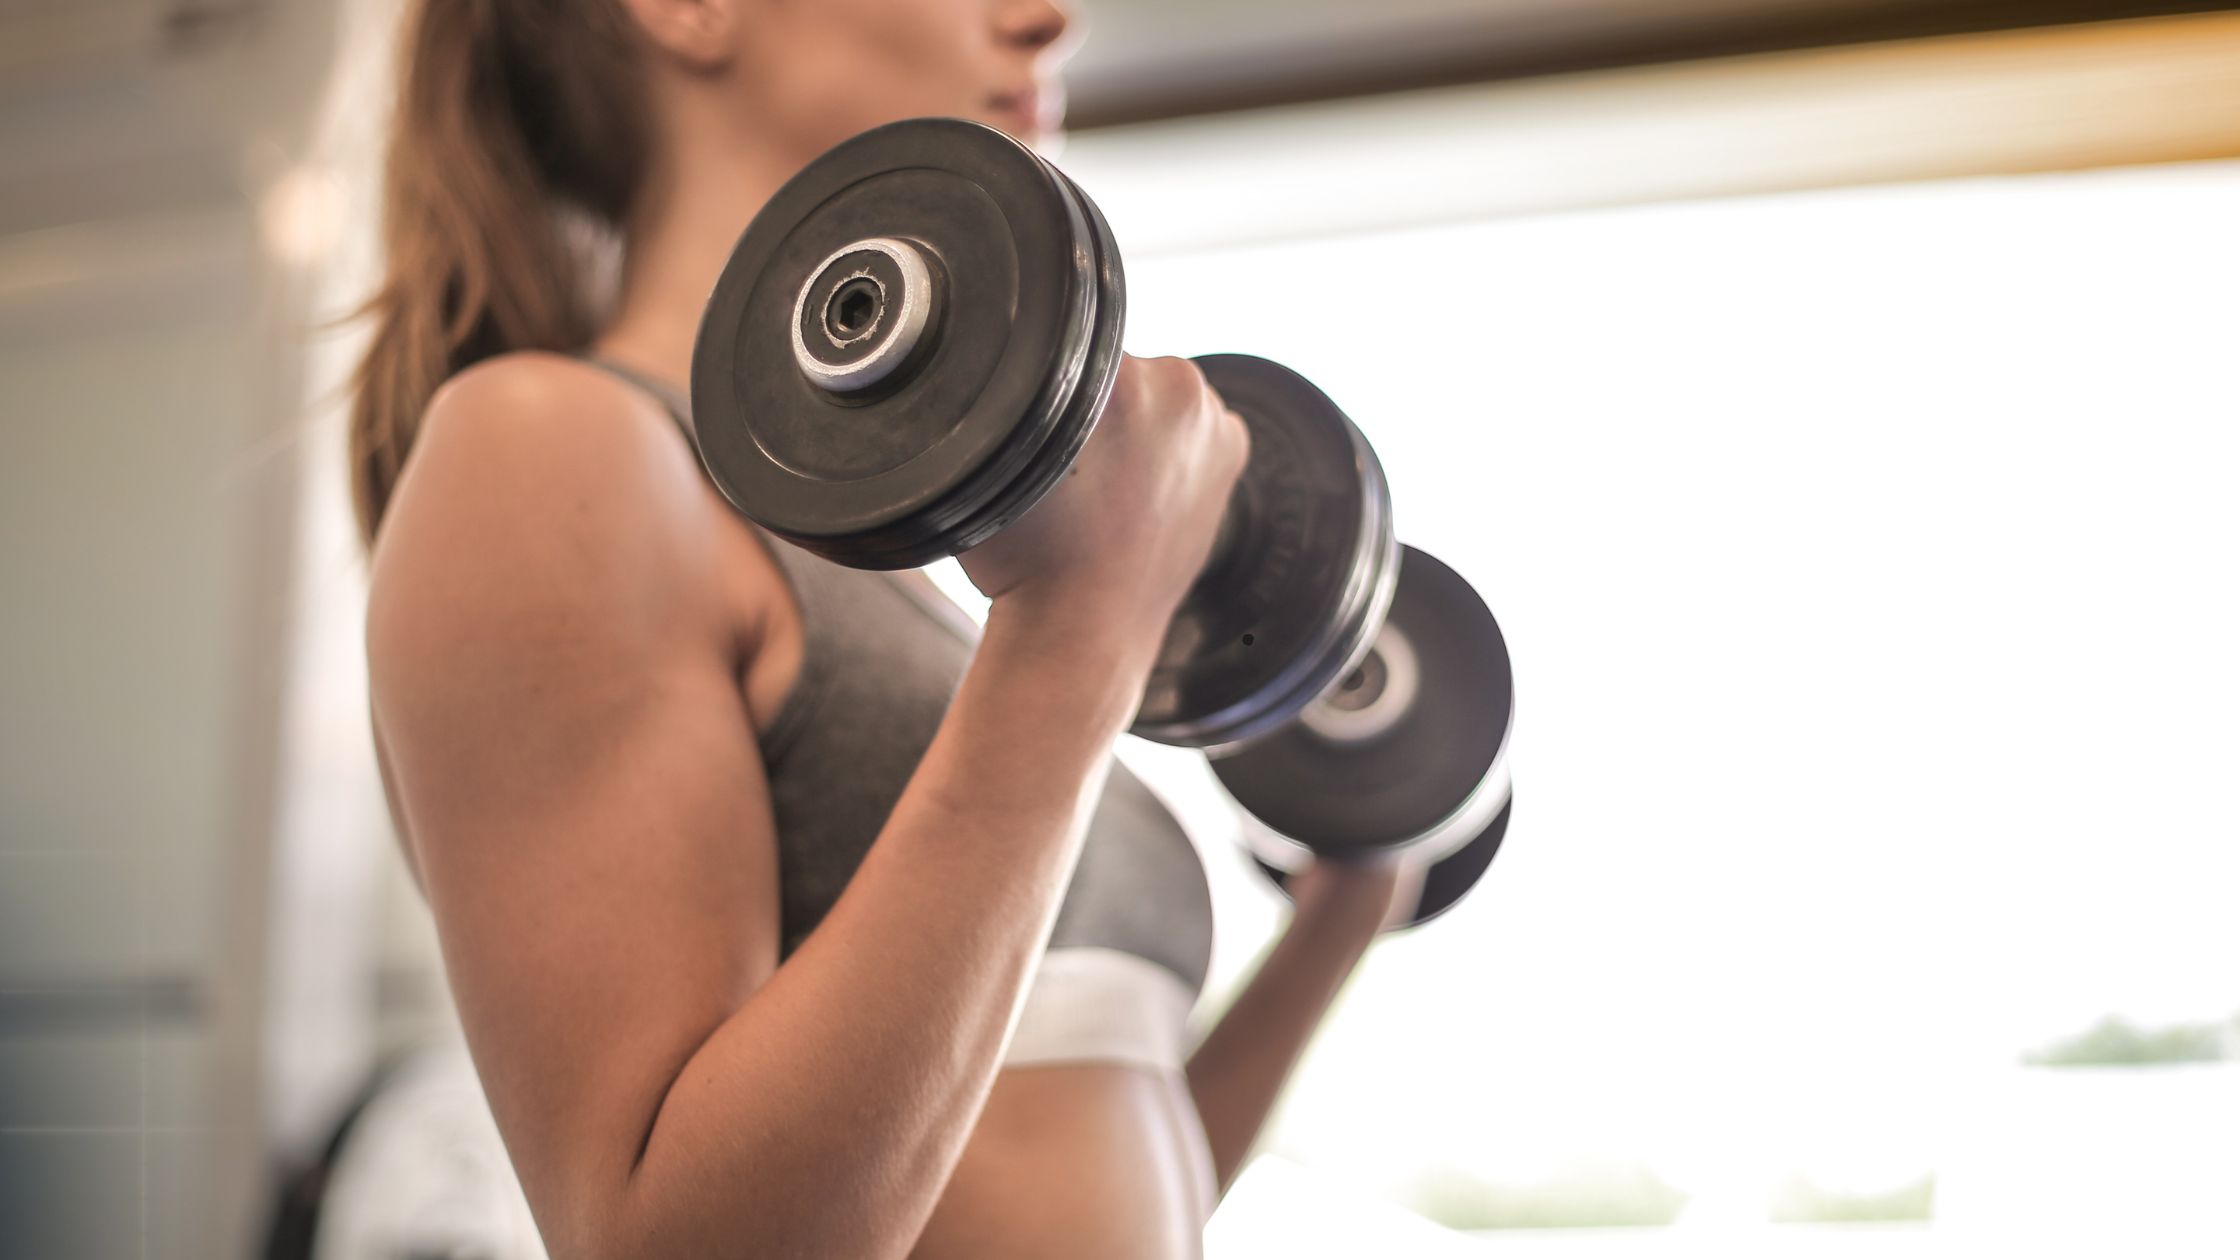
Top 10 Pre-Workout Foods to Boost Your Energy

Eating the right foods before a workout can significantly enhance your performance, improve your stamina, and help you achieve your fitness goals. Pre-workout nutrition is all about fueling your body with the energy it needs to power through your exercise routine. Here’s a list of the top 10 pre-workout foods that will give you the energy boost you need.

10 Pre-Workout Foods

Bananas

Often referred to as “nature’s energy bar,” bananas are an excellent pre-workout snack. They are rich in carbohydrates, which provide quick energy, and packed with potassium, which helps maintain muscle function. The natural sugars in bananas, combined with their easy-to-digest nature, make them a perfect choice for a quick energy boost before hitting the gym.

Oats

Oats are a great source of complex carbohydrates that provide a steady release of energy during your workout. They are also rich in fiber, which helps to keep you full and satisfied. A bowl of oatmeal about an hour before your workout, perhaps topped with some fruit or honey, can fuel your body with the energy it needs for sustained performance.

Greek Yogurt with Berries

Greek yogurt combined with berries is an excellent pre-workout snack. Greek yogurt is high in protein, which helps with muscle repair and growth, while berries add a dose of carbohydrates and antioxidants. This combination provides a balance of energy and nutrients, making it ideal for those looking to build muscle while maintaining energy levels.

Whole Grain Bread with Peanut Butter

Whole grain bread is a fantastic source of complex carbohydrates, which provide long-lasting energy. Pairing it with peanut butter adds healthy fats and protein, which help to sustain your energy levels and support muscle function. This combination is easy to prepare and digest, making it a convenient pre-workout snack.

Brown Rice with Chicken

If you’re looking for a more substantial pre-workout meal, brown rice with chicken is a solid option. Brown rice is a slow-digesting carbohydrate that provides a steady stream of energy, while chicken offers lean protein to support muscle recovery and growth. Eating this meal a couple of hours before your workout will help fuel a longer, more intense exercise session.

Smoothies

Smoothies are a versatile and easy-to-digest pre-workout option. By blending fruits like bananas, berries, or mangoes with a source of protein like Greek yogurt or protein powder, you can create a balanced pre-workout meal. Adding some oats or a handful of spinach can further boost the nutritional content. Smoothies provide quick energy and hydration, making them ideal for those who prefer a liquid meal before working out.

Apple Slices with Almond Butter

Apples provide a natural source of carbohydrates and sugars, which are quickly converted into energy. Pairing apple slices with almond butter adds healthy fats and protein, creating a well-rounded snack that will keep you energized throughout your workout. This snack is also rich in fiber, which helps maintain steady energy levels.

Eggs and Whole Wheat Toast

Eggs are a fantastic source of high-quality protein, and when paired with whole wheat toast, they provide a balanced pre-workout meal. The protein in eggs helps with muscle recovery, while the whole wheat toast provides complex carbohydrates for sustained energy. This combination is particularly effective if you’re aiming for muscle growth and endurance.

Dried Fruit and Nuts

Dried fruit like raisins, apricots, or dates are rich in simple carbohydrates that can provide a quick energy boost before your workout. When combined with nuts, which are high in healthy fats and protein, this snack becomes a powerful source of energy and nutrients. This mix is easy to carry, making it a convenient option for those on the go.

Sweet Potatoes

Sweet potatoes are a nutrient-dense source of complex carbohydrates, offering a slow and steady release of energy. They are also high in potassium and vitamin A, which support muscle function and recovery. Eating sweet potatoes about 1-2 hours before your workout can help you power through even the most intense exercise sessions.

Tips for Pre-Workout Nutrition

Timing Matters: Aim to eat your pre-workout meal or snack about 30 minutes to 2 hours before exercising, depending on the size of the meal. Larger meals need more time to digest, while smaller snacks can be consumed closer to your workout.

Hydration: Don’t forget to hydrate! Drink plenty of water before your workout to ensure your muscles are well-hydrated and can perform at their best.

Balance is Key: Your pre-workout meal should be balanced, including carbohydrates for energy, protein for muscle support, and a small amount of healthy fats. Avoid foods that are too high in fat or fiber close to your workout, as they can cause digestive discomfort.

Listen to Your Body: Everyone’s body responds differently to food, so it’s important to find what works best for you. Experiment with different foods and timing to see what gives you the best energy and performance during your workout.

FAQs

 How long before my workout should I eat?

It’s best to eat a small snack 30 minutes to an hour before your workout or a larger meal about 2-3 hours beforehand. This allows your body enough time to digest the food and convert it into energy.

 Can I work out on an empty stomach?

Working out on an empty stomach, also known as fasted cardio, can be effective for some people, especially for low-intensity workouts. However, for more intense sessions, having a small pre-workout snack is usually better to maintain energy and performance.

Should I avoid fats before a workout?

While healthy fats are important in your diet, they take longer to digest. It’s generally better to focus on carbohydrates and protein for your pre-workout meal to provide quick energy and support muscle function.

Conclusion

Choosing the right pre-workout foods can make a significant difference in your energy levels and overall workout performance. Whether you prefer a light snack or a more substantial meal, the key is to fuel your body with the right balance of nutrients. By incorporating these top 10 pre-workout foods into your routine, you’ll be better equipped to achieve your fitness goals and make the most out of every workout.

How to Create a Balanced Meal Plan for Muscle Gain: A Comprehensive Guide

Building muscle requires more than just lifting weights and working out; it also demands a well-balanced meal plan that provides your body with the nutrients it needs to grow and repair muscle tissue. Creating a meal plan for muscle gain involves understanding the right balance of macronutrients, timing your meals effectively, and selecting foods that support your fitness goals. Here’s how to craft a balanced meal plan that will help you gain muscle efficiently and sustainably.

Understand Your Caloric Needs

Calculate Your Caloric Intake

To gain muscle, you need to consume more calories than your body burns in a day. This is known as a caloric surplus. The amount of surplus you need will depend on your metabolism, activity level, and body composition goals. Start by calculating your Basal Metabolic Rate (BMR), which is the number of calories your body needs to maintain its current weight at rest. Then, add calories based on your activity level and muscle gain goals, typically 250-500 calories above your maintenance level.

Avoid Excessive Surplus

While it’s important to be in a caloric surplus for muscle gain, consuming too many extra calories can lead to unwanted fat gain. Aim for a moderate surplus that supports muscle growth without significantly increasing body fat.

Balance Your Macronutrients

Protein: The Building Block of Muscle

Protein is essential for muscle repair and growth. Aim to consume 1.2 to 2.0 grams of protein per kilogram of body weight daily. High-quality protein sources include lean meats (chicken, turkey, beef), fish, eggs, dairy products, legumes, and plant-based proteins like tofu and tempeh.

Carbohydrates: Fuel for Your Workouts

Carbohydrates are your body’s primary energy source, especially during intense workouts. They help replenish glycogen stores in your muscles, which is crucial for recovery and performance. Aim for complex carbohydrates such as whole grains (brown rice, oats, quinoa), vegetables, fruits, and legumes. Carbohydrates should make up about 45-60% of your total daily calorie intake.

Fats: Essential for Hormone Production

Fats are important for hormone production, including testosterone, which plays a key role in muscle growth. Include healthy fats in your diet, such as those found in avocados, nuts, seeds, olive oil, and fatty fish like salmon. Fats should constitute about 20-35% of your daily caloric intake.

Plan Your Meals Around Workouts

Pre-Workout Nutrition

Consume a balanced meal 2-3 hours before your workout, focusing on a combination of protein and complex carbohydrates. This meal provides your body with the energy it needs to perform at its best. For example, grilled chicken with sweet potatoes and vegetables is a great pre-workout meal.

Post-Workout Nutrition

After your workout, your muscles are primed to absorb nutrients, making this the ideal time to refuel. Aim for a post-workout meal or snack that includes both protein and carbohydrates within 30-60 minutes of finishing your workout. A protein shake with a banana or a serving of grilled fish with brown rice are excellent options.

Timing and Frequency of Meals

To maintain a steady flow of nutrients to your muscles, aim to eat 4-6 smaller meals throughout the day. This helps keep your energy levels stable and provides a consistent supply of protein for muscle repair.

Choose the Right Foods

Protein-Rich Foods

Incorporate a variety of protein sources into your diet to ensure you’re getting all the essential amino acids needed for muscle growth. Great options include:

Chicken breast
Turkey
Lean beef
Fish (salmon, tuna, cod)
Eggs
Greek yogurt
Cottage cheese
Lentils, chickpeas, and other legumes
Tofu and tempeh

Complex Carbohydrates

Choose slow-digesting carbohydrates that provide sustained energy. Include foods like:

Oats
Brown rice
Quinoa
Sweet potatoes
Whole wheat bread and pasta
Fruits like apples, berries, and bananas
Vegetables like broccoli, spinach, and carrots

Healthy Fats

Incorporate sources of healthy fats that support overall health and hormone function:

Avocados
Olive oil
Nuts (almonds, walnuts)
Seeds (chia seeds, flaxseeds)
Fatty fish (salmon, mackerel)
Dark chocolate (in moderation)

Monitor and Adjust Your Plan

Track Your Progress

Keep track of your calorie and macronutrient intake using a food diary or an app. Monitor your progress by regularly checking your weight, body composition, and strength levels. Adjust your caloric intake and macronutrient ratios as needed based on your progress.

Stay Hydrated

Hydration is key to maintaining performance and supporting muscle recovery. Aim to drink at least 3 liters of water per day, more if you’re sweating heavily during workouts.

Supplement Wisely

While whole foods should be the foundation of your meal plan, supplements can help fill nutritional gaps. Common supplements for muscle gain include whey protein, creatine, and branched-chain amino acids (BCAAs). Consult with a healthcare professional before adding any supplements to your diet.

FAQs

How much protein do I need to consume daily for muscle gain?

Aim for 1.2 to 2.0 grams of protein per kilogram of body weight each day to support muscle repair and growth.

Should I eat before or after my workout?

Both are important. Eat a balanced meal with protein and complex carbohydrates 2-3 hours before your workout and a post-workout meal or snack within 30-60 minutes after exercising to optimize recovery and muscle gain.

Can I rely on supplements for muscle gain?

While supplements like protein powder and creatine can be helpful, they should complement a diet rich in whole foods, not replace it. Always prioritize nutrient-dense, whole foods for best results.

Conclusion

Creating a balanced meal plan for muscle gain involves more than just eating more food; it requires careful consideration of your caloric needs, macronutrient balance, and meal timing. By focusing on high-quality proteins, complex carbohydrates, and healthy fats, and aligning your meals with your workout schedule, you can optimize your nutrition to support muscle growth. Remember to monitor your progress, stay hydrated, and adjust your plan as needed to ensure you’re on track to reach your muscle gain goals. With the right approach, your diet can become a powerful tool in your muscle-building journey.


How to Create a Full-Body Workout Routine Without Equipment

Creating a full-body workout routine without equipment is an excellent way to stay fit, build strength, and improve your overall health without the need for a gym membership or expensive gear. By using your body weight and focusing on fundamental movements, you can achieve a comprehensive workout that targets all major muscle groups. Here’s how to design an effective full-body workout routine using nothing but your body weight.

Understand the Basics of a Full-Body Workout

A full-body workout targets multiple muscle groups in a single session, ensuring that your entire body gets a balanced workout. The key components of a full-body routine include:

Upper Body Exercises: Focus on your chest, shoulders, arms, and back.
Lower Body Exercises: Target your legs, glutes, and calves.
Core Exercises: Strengthen your abdominals, obliques, and lower back.
By incorporating exercises from each of these categories, you can create a well-rounded workout that improves strength, flexibility, and endurance.

Choose Compound Movements

Compound movements are exercises that engage multiple muscle groups at once, making them ideal for full-body workouts. These exercises not only build strength but also improve coordination and burn more calories. Here are some essential compound movements to include in your routine:

Push-Ups: Targets the chest, shoulders, triceps, and core.
Squats: Engages the quads, hamstrings, glutes, and core.
Lunges: Focuses on the quads, hamstrings, glutes, and calves.
Planks: Strengthens the core, shoulders, and back.
Burpees: A full-body exercise that combines cardio with strength training.

Designing Your Workout Routine

To create a balanced workout, aim to include exercises that target the upper body, lower body, and core. Here’s a sample full-body workout routine that you can do without any equipment:

Warm-Up (5-10 minutes):

Jumping jacks
Arm circles
Leg swings
High knees

Workout (3 sets of each exercise):

Push-Ups (12-15 reps):

Start in a plank position with your hands slightly wider than shoulder-width apart.
Lower your body until your chest nearly touches the floor.
Push back up to the starting position.

Bodyweight Squats (15-20 reps):

Stand with your feet shoulder-width apart.
Lower your body by bending your knees and hips, keeping your back straight.
Push through your heels to return to the starting position.

Plank (Hold for 30-60 seconds):

Lie face down and lift your body onto your toes and forearms.
Keep your body in a straight line from head to heels.
Hold the position, engaging your core.

Lunges (12-15 reps per leg):

Step forward with one leg and lower your body until both knees are bent at 90 degrees.
Push off the front foot to return to the starting position.
Alternate legs with each repetition.

Burpees (10-15 reps):

Start in a standing position, then drop into a squat and place your hands on the floor.
Jump your feet back into a plank position.
Perform a push-up, then jump your feet back to your hands and explode into a jump as you stand.

Cool Down (5-10 minutes):

Stretch your hamstrings, quads, chest, and shoulders.
Perform deep breathing exercises to relax your muscles.

Modify Exercises to Suit Your Fitness Level

One of the advantages of bodyweight exercises is their versatility. You can easily modify each movement to match your fitness level:

Beginner: Perform push-ups on your knees, do half squats, or reduce the number of repetitions.
Intermediate: Follow the standard routine with the suggested number of sets and reps.
Advanced: Increase the intensity by adding variations like one-legged squats, explosive push-ups, or extended plank holds.

Incorporate Cardio for Added Benefits

While strength training is essential, adding cardiovascular exercises can enhance your full-body workout. Cardio helps improve heart health, burn calories, and boost endurance. You can incorporate short bursts of cardio between strength exercises or dedicate separate sessions to it.

Some effective cardio options include:

High Knees: Run in place, lifting your knees as high as possible.
Mountain Climbers: From a plank position, alternately bring your knees to your chest at a fast pace.
Jumping Jacks: A simple yet effective way to elevate your heart rate.

Consistency is Key

To see progress, consistency is crucial. Aim to perform your full-body workout routine 3-4 times per week, allowing at least one day of rest between sessions. As you become stronger, you can gradually increase the intensity, duration, or frequency of your workouts.

Listen to Your Body

Pay attention to how your body responds to each workout. If you feel pain (not to be confused with the normal discomfort of exercise), it’s important to stop and assess what might be causing it. Proper form is critical to avoiding injuries, so take the time to learn the correct technique for each exercise.

Track Your Progress

Keeping a workout journal can help you stay motivated and track your progress. Note down the exercises, sets, reps, and any modifications you make. This will allow you to see improvements over time and make adjustments to your routine as needed.

Fuel Your Body Properly

A balanced diet plays a vital role in achieving your fitness goals. Ensure you’re eating enough protein to support muscle repair and growth, along with a mix of carbohydrates and healthy fats to fuel your workouts. Staying hydrated is also essential, especially when performing intense exercises.

FAQs

Can I build muscle without using any equipment?

Yes, you can build muscle using just your body weight. Exercises like push-ups, squats, and planks effectively target and strengthen various muscle groups without the need for equipment.

How often should I do a full-body workout routine?

For optimal results, aim to do a full-body workout 3-4 times per week, with at least one rest day between sessions to allow your muscles to recover and grow.

What if I find the exercises too difficult?

If the exercises are too challenging, start with modified versions, such as knee push-ups or half squats. As you build strength, you can gradually progress to the standard forms of each exercise.

Conclusion

Creating a full-body workout routine without equipment is an effective way to stay fit, build muscle, and improve your overall health. By focusing on compound movements, maintaining consistency, and listening to your body, you can achieve great results with just your body weight. Remember, the key to success is to start at your own pace, gradually increase intensity, and enjoy the process of getting stronger and healthier.

How to Color Coordinate Men’s Clothing

Color coordination is a crucial aspect of men’s fashion that can elevate a simple outfit to a stylish ensemble. This guide will help you understand the basics of color matching and provide practical tips for creating well-coordinated outfits.

Understanding Color Theory:

Color Wheel: Familiarize yourself with the color wheel to understand how colors relate to each other.
Primary Colors: Red, blue, and yellow are the foundation of all other colors.
Secondary Colors: Green, purple, and orange are created by mixing primary colors.
Complementary Colors: Colors opposite each other on the wheel (e.g., blue and orange) create high contrast.
Analogous Colors: Colors next to each other on the wheel (e.g., blue and green) create harmony.

Basic Color Coordination Rules:

Neutral Base: Start with neutral colors like black, white, gray, or beige as a foundation.
Monochromatic: Use different shades of the same color for a sleek look.
Complementary Colors: Pair complementary colors for a bold statement, but use one as an accent.
Analogous Colors: Combine neighboring colors for a harmonious, sophisticated look.

Practical Tips:

Skin Tone: Choose colors that complement your skin tone. Warmer skin tones look good in earth tones, while cooler skin tones pair well with blues and grays.
Seasonal Colors: Adjust your palette to match the season. Lighter colors for spring/summer, darker for fall/winter.
The 60-30-10 Rule: Use 60% of a dominant color, 30% of a secondary color, and 10% of an accent color in your outfit.
Pattern Mixing: When mixing patterns, vary the scale and keep colors in the same family.
Accessories: Use accessories like ties, pocket squares, or socks to add pops of color to neutral outfits.
Denim: Dark denim is versatile and pairs well with most colors.
Suit Coordination: Match your tie to your suit’s secondary color, not the primary color.
Shoes and Belt: Generally, match your belt to your shoes for a cohesive look.
Confidence: Wear colors that make you feel confident. Confidence is the best accessory.
Experiment: Don’t be afraid to try new color combinations. Fashion is about personal expression.

FAQS

How do I match my shirt and tie colors?

Choose a tie that contains a color from your shirt, but in a different shade. For patterned shirts, pick a tie color that complements the dominant shirt color.

Can I wear black and brown together?

While traditionally avoided, black and brown can work together if done thoughtfully. Try pairing dark brown shoes with a black suit for a modern look.

What’s an easy way to add color to a neutral outfit?

Use accessories like a colorful pocket square, socks, or watch strap to add a pop of color to an otherwise neutral ensemble.

By following these guidelines, you can create well-coordinated outfits that enhance your personal style. Remember, these are guidelines, not strict rules. As you become more comfortable with color coordination, feel free to experiment and develop your unique style.

How Do Shein Men’s Clothes Fit? A Comprehensive Guide

When it comes to online shopping, one of the biggest concerns is fit, especially with brands like Shein that offer trendy and affordable fashion. Understanding how Shein men’s clothes fit can help you make more informed purchasing decisions and avoid the hassle of returns. Here’s an in-depth look at Shein men’s clothing fit, including tips on sizing, quality, and how to find the right fit for your body type.

Understanding Shein’s Sizing

Shein is known for its diverse range of styles and competitive pricing, but sizing can sometimes be tricky. Here are some key points to consider:

Size Charts: Shein provides detailed size charts for each item, which include measurements for the chest, waist, hips, shoulders, sleeves, and overall length. Always refer to these charts before making a purchase.

Measurements: Take your own measurements using a flexible tape measure. Compare your measurements with those listed in the size chart to find the best fit. Pay attention to both the metric (cm) and imperial (inch) measurements.

Fit Descriptions: Shein often includes descriptions of the fit (e.g., slim fit, regular fit, oversized) in the product details. These descriptions can give you an idea of how the garment will sit on your body.

Common Fit Issues and Solutions

Inconsistent Sizing: Sizing can vary between different items and styles. Always check the specific size chart for each item rather than relying on a general size.

Asian Sizing: Some Shein clothing uses Asian sizing, which tends to run smaller than US or European sizes. Consider ordering one or two sizes up if the item uses Asian sizing.

Customer Reviews: Read customer reviews and look at the photos they provide. Reviews often mention whether an item runs true to size, small, or large. User-uploaded photos can also give a more realistic idea of fit and quality.

Tips for Finding the Right Fit

Check Fabric and Stretch: The type of fabric can affect the fit. Stretchy materials like spandex or elastane blends will have more give and can be more forgiving in terms of sizing.

Consider Your Body Type: Understand your body type and how different styles fit. For instance, slim-fit clothes may not be ideal for broader body types, while regular or relaxed fits may provide a more comfortable and flattering look.

Look for Adjustable Features: Items with adjustable features like drawstrings, elastic waistbands, and buttons can offer a better fit.

Shein Men’s Clothing Categories

Tops (T-shirts, Shirts, Hoodies): Generally, Shein tops have a standard fit. Pay attention to shoulder and chest measurements for the best fit. Hoodies and sweatshirts may have a looser fit compared to shirts and T-shirts.

Bottoms (Jeans, Trousers, Shorts): For bottoms, focus on waist and hip measurements. The inseam length is also crucial for trousers and jeans. Stretchy materials in shorts and joggers can provide additional comfort.

Outerwear (Jackets, Coats): Outerwear tends to run larger to accommodate layering. Check sleeve length and overall length to ensure a good fit, especially if you are taller or shorter than average.

Quality Considerations

Material: The quality of materials can vary. Read product descriptions carefully to know what materials are used. Higher-priced items may use better quality fabrics.

Stitching and Construction: Examine customer reviews for comments on stitching and construction. Poor stitching can indicate lower quality and affect the longevity of the garment.

FAQs

How do I determine the right size for Shein men’s clothes?

To determine the right size, refer to Shein’s detailed size charts provided for each item. Measure your chest, waist, hips, shoulders, and overall length, then compare these measurements to the size chart. Reading customer reviews and looking at user-uploaded photos can also help gauge the fit.

Do Shein men’s clothes run true to size?

Shein men’s clothes can vary in sizing, with some items running smaller due to Asian sizing. It’s recommended to check specific size charts for each item and consider ordering one or two sizes up if needed. Customer reviews often mention if an item runs true to size, small, or large.

What should I consider when buying Shein men’s clothes?

When buying Shein men’s clothes, consider the fabric type and whether it has any stretch, as this can affect the fit. Pay attention to the fit descriptions (e.g., slim fit, regular fit) and adjustable features like drawstrings or elastic waistbands. Reading customer reviews can also provide insights into the fit and quality of the garment.

Final Thought

Shein offers a wide variety of men’s clothing, but finding the right fit requires careful consideration of size charts, customer reviews, and your own measurements. By paying attention to these details, you can enjoy stylish and affordable fashion without the frustration of ill-fitting clothes. Happy shopping!


The Art of Draping: How to Wear a Shawl with a Formal Dress

A shawl is a versatile accessory that can elevate the elegance of any formal dress. Whether you are attending a wedding, a gala, or a formal dinner, knowing how to wear a shawl can add sophistication and style to your ensemble. This article will guide you through various ways to wear a shawl with a formal dress, ensuring you look graceful and chic on any occasion.

Classic Drape

Steps:

Fold the Shawl: Start by folding the shawl in half lengthwise if it’s too wide. This helps in managing the fabric better.
Drape Over Shoulders: Drape the shawl evenly over your shoulders, allowing it to hang down your back.
Adjust Front Length: Adjust the front so that the ends are of equal length.
Secure: You can either let the shawl hang loose or secure it with a decorative brooch or pin at the center of your chest.
When to Wear: This classic drape works well with strapless dresses or gowns with intricate bodice details that you don’t want to hide.

The Wrap Around

Steps:

Center the Shawl: Center the shawl on your back with the ends hanging over your shoulders.
Cross the Ends: Bring the ends of the shawl in front of you, crossing them over your chest.
Wrap Around: Wrap the ends around your back again, bringing them back to the front.
Tie or Knot: Tie a knot or a bow in front, just below your bust or at your waist.
When to Wear: This style is perfect for chilly evenings as it provides extra warmth and keeps the shawl secure.

Over-the-Shoulder Toss

Steps:

Drape Over Shoulders: Drape the shawl over your shoulders, ensuring that one end is longer than the other.
Toss Over Shoulder: Take the longer end and toss it over the opposite shoulder, letting it drape elegantly down your back.
When to Wear: Ideal for dresses with intricate back designs or low backs, allowing the dress to be the focal point.

Belted Shawl

Steps:

Drape Shawl: Drape the shawl evenly over your shoulders.
Add a Belt: Place a belt over the shawl at your waist, cinching it in to create a structured look.
Adjust Shawl: Adjust the shawl so that it drapes nicely over your torso and flows down your sides.
When to Wear: This look is great for adding shape to flowy dresses and creating a more defined silhouette.

The Shawl Scarf

Steps:

Fold Shawl: Fold the shawl into a long, narrow strip.
Drape Around Neck: Drape the folded shawl around your neck, with the ends hanging down your front.
Tie Ends: Tie the ends in a loose knot or a bow, letting them hang elegantly.
When to Wear: Suitable for dresses with high necklines or when you want to add a touch of warmth without covering your shoulders.

One-Shoulder Drape

Steps:

Place Shawl on One Shoulder: Drape the shawl over one shoulder, allowing one end to hang down in front and the other end down your back.
Secure with a Pin: Secure the shawl on your shoulder with a decorative pin or brooch to keep it in place.
When to Wear: Perfect for asymmetrical dresses or dresses with unique shoulder details.

Tips for Choosing the Right Shawl

Material: Choose a shawl made of silk, chiffon, or cashmere for a luxurious feel. Avoid bulky fabrics that might overshadow your dress.
Color: Select a shawl that complements your dress. Neutral colors like black, white, and nude are versatile, while a bold color can add a pop of interest.
Size: Ensure the shawl is large enough to drape gracefully but not so large that it overwhelms your frame.
Embellishments: If your dress is simple, a shawl with embellishments like embroidery, sequins, or lace can add a touch of glamour.

FAQs

How do I keep my shawl from slipping off during an event?

To prevent your shawl from slipping, you can secure it with a decorative brooch or pin. Another option is to choose a style that wraps the shawl around your shoulders or ties it in place, such as the wrap-around or belted shawl style.

Can I wear a patterned shawl with a formal dress?

Yes, you can wear a patterned shawl with a formal dress, but it’s important to ensure the patterns complement each other. If your dress is plain, a patterned shawl can add visual interest. Conversely, if your dress has intricate designs, opt for a solid-colored shawl to avoid a clashing look.

What shawl material is best for a formal occasion?

For formal occasions, choose luxurious materials like silk, chiffon, or cashmere. These fabrics drape beautifully and add an elegant touch to your ensemble. Avoid heavy or bulky materials that can detract from the sophistication of your outfit.

Final Thought

Wearing a shawl with a formal dress is an elegant way to enhance your outfit. Whether you choose a classic drape or a more creative wrap, the key is to ensure the shawl complements your dress and adds to your overall look. Experiment with different styles to find the one that suits you best, and enjoy the added touch of sophistication that a shawl brings to your formal attire.


How to Become a Fashion Stylist: A Comprehensive Guide

Fashion stylists play a crucial role in the fashion industry, working behind the scenes to create the looks that define trends and captivate audiences. If you have a keen eye for fashion, a passion for creativity, and the ability to bring out the best in people through clothing, becoming a fashion stylist might be your ideal career path. Here’s a detailed guide on how to embark on this exciting journey.

A Comprehensive Guide

Understand the Role of a Fashion Stylist

A fashion stylist is responsible for selecting clothing and accessories for editorial features, advertising campaigns, music videos, concert performances, and public appearances by celebrities and models. They work closely with designers, photographers, makeup artists, and clients to create cohesive and visually appealing looks.

Develop Your Fashion Sense

Fashion stylists need to have an innate sense of style and an understanding of current trends. Here’s how you can develop your fashion sense:

Stay Updated: Follow fashion blogs, magazines, and social media accounts of prominent fashion influencers and designers.
Attend Fashion Shows: If possible, attend fashion shows and industry events to see the latest collections and understand emerging trends.
Create Mood Boards: Use tools like Pinterest to create mood boards that capture your styling ideas and inspirations.

Get the Necessary Education and Training

While formal education is not strictly required, it can provide a solid foundation and make you more competitive in the industry:

Fashion Design or Styling Programs: Enroll in fashion design or styling programs offered by art schools or fashion institutes. These programs often cover key areas like fashion history, textiles, color theory, and trend forecasting.
Workshops and Courses: Participate in workshops and online courses focused on styling techniques, personal branding, and portfolio development.

Gain Practical Experience

Hands-on experience is crucial for becoming a successful fashion stylist:

Internships: Apply for internships with established stylists, fashion magazines, or design houses. This experience will give you insight into the industry and help you build a network of contacts.
Assisting: Start as a stylist assistant to gain on-the-job training. This role will help you understand the daily responsibilities and challenges of a fashion stylist.
Personal Projects: Work on personal projects like styling friends or organizing photoshoots to practice your skills and build your portfolio.

Build a Strong Portfolio

A compelling portfolio is essential for showcasing your styling abilities to potential clients and employers:

Diverse Looks: Include a variety of looks that demonstrate your versatility, from high fashion editorials to everyday styling.
Professional Photography: Collaborate with photographers to ensure your work is presented in the best possible light.
Online Presence: Create an online portfolio on platforms like Instagram, Behance, or your own website to reach a wider audience.

Network and Build Industry Connections

Networking is key to advancing your career as a fashion stylist:

Industry Events: Attend fashion shows, trade shows, and networking events to meet industry professionals.
Social Media: Use social media to connect with designers, models, photographers, and other stylists. Engage with their content and showcase your work.
Join Professional Organizations: Become a member of professional organizations like the Fashion Group International (FGI) to access resources and networking opportunities.

Market Yourself

Promoting your personal brand is crucial for attracting clients and job opportunities:

Social Media Marketing: Use platforms like Instagram, TikTok, and Pinterest to share your work, behind-the-scenes content, and fashion tips.
Blogging and Vlogging: Start a blog or YouTube channel to share your expertise and insights on fashion trends and styling advice.
Collaborations: Partner with brands, influencers, and other creatives to expand your reach and gain exposure.

Stay Adaptable and Continually Learn

The fashion industry is dynamic and constantly evolving. Stay adaptable and committed to continuous learning:

Professional Development: Attend workshops, take online courses, and read industry publications to stay informed about the latest trends and techniques.
Feedback and Improvement: Seek feedback from clients and colleagues to improve your skills and adapt to changing industry standards.


FAQs

What qualifications do I need to become a fashion stylist?

While formal qualifications are not strictly required to become a fashion stylist, having a background in fashion-related education can be beneficial. This includes:

Fashion Design or Styling Programs: Enrolling in programs at fashion schools or institutes that cover essential areas like fashion history, textiles, and trend forecasting.
Workshops and Online Courses: Participating in specialized styling workshops or online courses to enhance your skills.
Practical experience through internships, assisting established stylists, and working on personal projects is crucial to building your portfolio and industry knowledge.

How can I build a strong portfolio as a fashion stylist?

Building a strong portfolio is essential for showcasing your styling abilities. Here’s how you can do it:

Diverse Looks: Include a variety of styles that demonstrate your versatility, from high fashion to everyday wear.
Professional Photography: Collaborate with photographers to ensure high-quality images of your work.
Online Presence: Create an online portfolio on platforms like Instagram, Behance, or your own website to reach a wider audience.
Regularly update your portfolio with new work to reflect your current skills and aesthetic.

What are some effective ways to network in the fashion industry?

Networking is crucial for advancing your career as a fashion stylist. Effective ways to network include:

Attending Industry Events: Participate in fashion shows, trade shows, and networking events to meet industry professionals.
Social Media: Use platforms like Instagram and LinkedIn to connect with designers, models, photographers, and other stylists. Engage with their content and share your work.
Joining Professional Organizations: Become a member of organizations like the Fashion Group International (FGI) to access resources and networking opportunities.
Collaborations: Partner with brands, influencers, and other creatives to expand your reach and gain exposure in the industry.

Final Thought

Becoming a fashion stylist requires a blend of creativity, education, practical experience, and networking. By following these steps, you can develop the skills and connections needed to succeed in this competitive industry. Embrace your passion for fashion, continuously refine your styling abilities, and seize opportunities to make your mark as a fashion stylist.


Perfecting the Old Fashioned: How Much Simple Syrup to Use

The Old Fashioned, a timeless cocktail beloved by aficionados and casual drinkers alike, is a masterclass in simplicity and balance. Comprised of just a few key ingredients—whiskey, bitters, sugar, and water—it’s a drink that celebrates the rich flavors of the spirit while allowing subtle nuances to shine through. However, one question that often arises when crafting the perfect Old Fashioned is: How much simple syrup should be used? Let’s delve into this essential aspect of cocktail-making to ensure your next Old Fashioned is nothing short of perfection.

Step-by-step tips

Understanding the Old Fashioned

Before we delve into the specifics of simple syrup measurements, let’s take a moment to appreciate the essence of the Old Fashioned. Dating back to the early 19th century, this iconic cocktail is traditionally made with bourbon or rye whiskey, a dash of bitters, a sugar cube (or simple syrup), and a twist of citrus zest. Its beauty lies in its simplicity and the balance achieved between the sweetness of the sugar, the bitterness of the bitters, and the boldness of the whiskey.

Finding the Sweet Spot

When it comes to the sweet component of the Old Fashioned, the amount of simple syrup used is a matter of personal preference. Some prefer a sweeter cocktail with a more pronounced sweetness, while others prefer a drier, more spirit-forward drink. As a general guideline, start with a conservative amount of simple syrup—around ¼ to ½ ounce—and adjust to taste from there.

Tailoring to Taste

The beauty of the Old Fashioned lies in its versatility and adaptability to individual tastes. If you prefer a sweeter cocktail, you may opt for a larger amount of simple syrup, perhaps closer to ½ ounce or even slightly more. Conversely, if you prefer a drier, more spirit-forward drink, you may choose to use less simple syrup, aiming for around ¼ ounce or even just a few drops to lightly sweeten the cocktail.

Balancing Act

Regardless of the amount of simple syrup used, achieving balance is key when crafting the perfect Old Fashioned. The sweetness of the sugar should complement, rather than overpower, the other elements of the cocktail. It should enhance the flavors of the whiskey and bitters, adding depth and complexity without overwhelming the palate.

Experimentation and Refinement

As with any cocktail, the key to mastering the Old Fashioned lies in experimentation and refinement. Start with a basic recipe, then adjust the proportions of each ingredient—whiskey, bitters, and simple syrup—until you find the perfect balance that suits your palate. Don’t be afraid to get creative and tailor the cocktail to your personal preferences.

FAQs

How much simple syrup should I use in an Old Fashioned?

The amount of simple syrup in an Old Fashioned can vary based on personal preference. As a starting point, try using around ¼ to ½ ounce of simple syrup and adjust to taste from there, keeping in mind the desired sweetness level.

Can I make an Old Fashioned without simple syrup?

While traditional Old Fashioned recipes call for a sugar cube or simple syrup, you can experiment with alternative sweeteners such as honey, maple syrup, or agave nectar. Adjust the amount to achieve your desired level of sweetness.

What if I prefer a drier Old Fashioned?

If you prefer a drier, more spirit-forward Old Fashioned, use a smaller amount of simple syrup, such as around ¼ ounce or even just a few drops. This will lightly sweeten the cocktail without overpowering the other flavors.

In Conclusion

So, how much simple syrup should you use in an Old Fashioned? The answer ultimately depends on your individual taste preferences. Start with a conservative amount and adjust to taste, keeping in mind the importance of achieving balance and harmony in this timeless cocktail. With a little experimentation and a discerning palate, you’ll soon be crafting Old Fashioneds that are nothing short of perfection. Cheers!

Exploring the Classic Elegance: What’s in an Old Fashioned Cocktail?

The Old Fashioned cocktail stands as a timeless icon of mixology, revered for its simplicity, depth of flavor, and rich history. With roots dating back to the early 19th century, this classic cocktail has endured the test of time, captivating the palates of cocktail enthusiasts worldwide. But what exactly goes into crafting this beloved libation? Let’s embark on a journey to uncover the ingredients that make an Old Fashioned cocktail a true embodiment of sophistication and tradition.

The Origins of the Old Fashioned

Before delving into its ingredients, it’s essential to understand the origins of the Old Fashioned cocktail. The drink traces its lineage to the early days of American cocktail culture, emerging during the 19th century as a simple concoction designed to showcase the flavors of whiskey, then known as “spirituous liquor.” Over the years, the recipe has evolved, but its fundamental essence remains rooted in tradition and refinement.

The Ingredients

Whiskey

Base Spirit: The cornerstone of an Old Fashioned cocktail is whiskey, traditionally bourbon or rye. The choice of whiskey imparts distinct nuances to the cocktail, with bourbon contributing a slightly sweeter profile and rye adding a spicier character.

Sugar

Sweetening Agent: A touch of sweetness is essential to balance the robust flavors of whiskey. Traditionally, a sugar cube or simple syrup is used to sweeten the cocktail, imparting a subtle sweetness that harmonizes with the whiskey’s rich

Bitters

Aromatic Complexity: Bitters add depth and complexity to the Old Fashioned, elevating its flavor profile with nuanced herbal and spice notes. Angostura bitters, with its iconic blend of botanicals and spices, is the classic choice for this cocktail, although other varieties may be used to customize the flavor.

Ice

Chilled Elegance: Ice plays a crucial role in the Old Fashioned, chilling the cocktail while subtly diluting its intensity. Large ice cubes or a single large ice sphere are preferred to minimize dilution and maintain the drink’s integrity.

Citrus Peel (Optional)

Garnish and Aroma: A twist of citrus peel, typically orange or lemon, adds a final flourish to the Old Fashioned, imparting aromatic oils that enhance the drinking experience. The citrus oils provide a refreshing counterpoint to the cocktail’s richness, accentuating its complexity.

Crafting the Perfect Old Fashioned

Now that we’ve explored the key ingredients, let’s assemble them to create the quintessential Old Fashioned cocktail:

Place a sugar cube (or a spoonful of simple syrup) in an Old Fashioned glass.
Add several dashes of Angostura bitters to the sugar cube.
Muddle the sugar cube with the bitters to dissolve it and release its flavors.
Add a splash of water to the glass and stir to further dissolve the sugar.
Add a large ice cube or sphere to the glass.
Pour 2 ounces of bourbon or rye whiskey over the ice.
Stir gently to chill the drink and incorporate the ingredients.
Express a twist of citrus peel over the glass to release its oils, then garnish the cocktail with the peel.
Serve and enjoy the timeless elegance of the Old Fashioned.

FAQs

What type of whiskey is typically used in an Old Fashioned?

The Old Fashioned cocktail traditionally features bourbon or rye whiskey as its base spirit. Bourbon lends a slightly sweeter flavor profile, while rye whiskey adds a spicier character to the cocktail.

Can I use a different type of sweetener besides a sugar cube or simple syrup in an Old Fashioned?

While a sugar cube or simple syrup is the traditional choice for sweetening an Old Fashioned, some variations may incorporate alternative sweeteners such as demerara syrup or maple syrup for a unique twist on the classic recipe.

Is the citrus peel garnish essential in an Old Fashioned cocktail?

While the citrus peel garnish adds a final flourish and aromatic complexity to the Old Fashioned, it is not considered essential. Some variations of the cocktail omit the citrus peel garnish altogether or substitute it with a cherry for a different flavor profile.

Final Thought

The Old Fashioned cocktail embodies a bygone era of elegance and refinement, offering a harmonious balance of whiskey, sweetness, and aromatic complexity. With just a handful of ingredients, this classic libation captures the essence of cocktail culture, inviting enthusiasts to savor its timeless allure. Whether sipped in a dimly lit speakeasy or crafted at home with care and precision, the Old Fashioned remains a cherished symbol of sophistication and tradition in the world of mixology.


How Much Gratuity for a Pedicure: A Guide to Tipping Etiquette

Tipping is an important aspect of the service industry, and knowing how much gratuity to give for a pedicure can enhance your salon experience and show appreciation for the technician’s work. Here’s a comprehensive guide to help you determine the appropriate amount to tip for a pedicure.

Standard Tipping Guidelines

Typical Percentage:

15-20% of the Total Bill: The generally accepted range for tipping in the beauty and spa industry is between 15% and 20% of the total service cost. This range is considered a standard way to show appreciation for good service.

Example Calculation:

If your pedicure costs $50, a 15% tip would be $7.50, and a 20% tip would be $10.
Factors Influencing Your Tip

Quality of Service:

Exceptional Service: If your pedicure experience exceeds your expectations, you might consider tipping more than 20%. Exceptional service might include extra care, personalized attention, or a particularly relaxing experience.

Adequate Service: If the service meets your expectations but isn’t outstanding, sticking to the 15-20% range is appropriate.

Subpar Service: If the service is below expectations, you might tip closer to the 15% mark or slightly less, but it’s usually a good idea to provide feedback to the technician or salon management in addition to adjusting your tip.

Salon Policies:

No-Tip Policies: Some high-end salons include gratuity in their service prices. Check your bill or ask the receptionist to see if this applies.

Cash or Card: Some salons prefer tips in cash even if you pay for the service with a card. It’s helpful to have some cash on hand for tipping purposes.

Special Circumstances:

Holiday Season: During holidays, it’s common to give a slightly higher tip to show extra appreciation.
Regular Clients: If you’re a regular customer and have built a rapport with your technician, you might consider tipping on the higher end of the scale to acknowledge their consistent service.

Additional Considerations

Group Services or Discounted Rates:

Discounts and Coupons: If you’re using a discount or coupon, base your tip on the original price of the service, not the discounted rate.

Group Services: If you’re part of a bridal party or group booking, ensure each technician is tipped individually based on the cost of the service they provided.

Additional Services:

Extra Treatments: If you receive additional treatments or upgrades, factor these into your total bill when calculating the tip. For example, if you add a foot massage or special nail art, increase your tip accordingly.

Etiquette Tips

Expressing Gratitude:

Thank You Notes: A simple verbal thank you or a small note can go a long way in making your technician feel appreciated in addition to the monetary tip.

Feedback: Providing positive feedback or constructive criticism can help improve your future visits and overall salon experience.

FAQs

What is the standard tip amount for a pedicure?

The standard tip amount for a pedicure typically ranges between 15% and 20% of the total bill. This range is considered appropriate for showing appreciation for good service. For example, if your pedicure costs $40, a 15% tip would be $6, while a 20% tip would be $8.

Should I tip more if I receive extra services during my pedicure?

Yes, if you receive additional services or upgrades, such as a foot massage or special nail art, it’s courteous to increase your tip accordingly. Calculate the tip based on the total cost of all the services you received. This shows your appreciation for the extra effort and time spent by the technician.

What if I’m not satisfied with the pedicure service?

If you’re not satisfied with the pedicure service, you can adjust your tip accordingly, typically tipping closer to the 15% mark or slightly less. However, it’s also important to provide feedback to the technician or salon management to address your concerns. Constructive feedback can help improve the service quality for future visits.

Final Thought

Tipping for a pedicure involves balancing standard etiquette with personal satisfaction and the quality of service received. By considering the percentage guidelines, quality of service, salon policies, and any special circumstances, you can determine an appropriate gratuity that reflects your appreciation for your pedicure technician’s hard work. A thoughtful tip not only rewards good service but also fosters a positive relationship with your salon, ensuring a pleasant experience every time you visit.