Perfecting the Old Fashioned: How Much Simple Syrup to Use

The Old Fashioned, a timeless cocktail beloved by aficionados and casual drinkers alike, is a masterclass in simplicity and balance. Comprised of just a few key ingredients—whiskey, bitters, sugar, and water—it’s a drink that celebrates the rich flavors of the spirit while allowing subtle nuances to shine through. However, one question that often arises when crafting the perfect Old Fashioned is: How much simple syrup should be used? Let’s delve into this essential aspect of cocktail-making to ensure your next Old Fashioned is nothing short of perfection.

Step-by-step tips

Understanding the Old Fashioned

Before we delve into the specifics of simple syrup measurements, let’s take a moment to appreciate the essence of the Old Fashioned. Dating back to the early 19th century, this iconic cocktail is traditionally made with bourbon or rye whiskey, a dash of bitters, a sugar cube (or simple syrup), and a twist of citrus zest. Its beauty lies in its simplicity and the balance achieved between the sweetness of the sugar, the bitterness of the bitters, and the boldness of the whiskey.

Finding the Sweet Spot

When it comes to the sweet component of the Old Fashioned, the amount of simple syrup used is a matter of personal preference. Some prefer a sweeter cocktail with a more pronounced sweetness, while others prefer a drier, more spirit-forward drink. As a general guideline, start with a conservative amount of simple syrup—around ¼ to ½ ounce—and adjust to taste from there.

Tailoring to Taste

The beauty of the Old Fashioned lies in its versatility and adaptability to individual tastes. If you prefer a sweeter cocktail, you may opt for a larger amount of simple syrup, perhaps closer to ½ ounce or even slightly more. Conversely, if you prefer a drier, more spirit-forward drink, you may choose to use less simple syrup, aiming for around ¼ ounce or even just a few drops to lightly sweeten the cocktail.

Balancing Act

Regardless of the amount of simple syrup used, achieving balance is key when crafting the perfect Old Fashioned. The sweetness of the sugar should complement, rather than overpower, the other elements of the cocktail. It should enhance the flavors of the whiskey and bitters, adding depth and complexity without overwhelming the palate.

Experimentation and Refinement

As with any cocktail, the key to mastering the Old Fashioned lies in experimentation and refinement. Start with a basic recipe, then adjust the proportions of each ingredient—whiskey, bitters, and simple syrup—until you find the perfect balance that suits your palate. Don’t be afraid to get creative and tailor the cocktail to your personal preferences.

FAQs

How much simple syrup should I use in an Old Fashioned?

The amount of simple syrup in an Old Fashioned can vary based on personal preference. As a starting point, try using around ¼ to ½ ounce of simple syrup and adjust to taste from there, keeping in mind the desired sweetness level.

Can I make an Old Fashioned without simple syrup?

While traditional Old Fashioned recipes call for a sugar cube or simple syrup, you can experiment with alternative sweeteners such as honey, maple syrup, or agave nectar. Adjust the amount to achieve your desired level of sweetness.

What if I prefer a drier Old Fashioned?

If you prefer a drier, more spirit-forward Old Fashioned, use a smaller amount of simple syrup, such as around ¼ ounce or even just a few drops. This will lightly sweeten the cocktail without overpowering the other flavors.

In Conclusion

So, how much simple syrup should you use in an Old Fashioned? The answer ultimately depends on your individual taste preferences. Start with a conservative amount and adjust to taste, keeping in mind the importance of achieving balance and harmony in this timeless cocktail. With a little experimentation and a discerning palate, you’ll soon be crafting Old Fashioneds that are nothing short of perfection. Cheers!

Nail Fungus Be Gone: Mastering Care Techniques for Healthy, Happy Nails!

Nail fungus, medically known as onychomycosis, is a common condition characterized by the infection of the toenails or fingernails by fungi. It can cause nails to become discolored, thickened, and brittle, often leading to discomfort and self-consciousness. While nail fungus can be stubborn to treat, there are several effective strategies for managing and preventing its spread. Here’s a comprehensive guide on how to take care of nail fungus:

A Comprehensive Guide: How to Take Care of Nail Fungus

Maintain Good Hygiene

Regularly clean and dry your feet or hands, paying special attention to the nails and surrounding skin. Use soap and water to wash the affected area thoroughly, and ensure it is completely dry afterward. Avoid sharing towels, socks, or shoes with others to prevent the spread of infection.

Trim Nails Properly

Keep your nails trimmed and filed to reduce the risk of further fungal growth. Trim nails straight across and avoid cutting them too short, as this can create small cuts or tears where fungi can enter. Use separate clippers or files for infected nails to prevent spreading the fungus to other nails.

Choose Breathable Footwear

Opt for breathable shoes made of materials like leather or mesh that allow air circulation and reduce moisture buildup. Avoid tight-fitting or non-breathable shoes, as they create a warm, moist environment ideal for fungal growth. Consider wearing open-toed shoes or sandals when possible to promote airflow to the affected nails.

Apply Antifungal Treatments

Over-the-counter antifungal creams, ointments, or nail lacquers can help combat nail fungus. Follow the instructions provided with the product and apply it to the affected nails regularly as directed. Some products may require daily application for several weeks or months to achieve results, so be patient and consistent with your treatment regimen.

Try Home Remedies

Several natural remedies may help alleviate nail fungus symptoms and inhibit fungal growth. These include applying tea tree oil, vinegar, or coconut oil to the affected nails, soaking them in diluted bleach or hydrogen peroxide solutions, or using essential oils with antifungal properties like oregano or lavender. While these remedies may offer relief for some individuals, results can vary, and it’s essential to consult with a healthcare professional before trying any home remedy.

Practice Prevention

Once you’ve successfully treated nail fungus, take steps to prevent its recurrence. Wear clean socks made of breathable materials and change them daily. Avoid walking barefoot in public places like gyms, pools, and locker rooms, where fungal infections can spread easily. Disinfect nail clippers, files, and other tools regularly to prevent reinfection, and consider using antifungal powder or spray in your shoes to keep them fungus-free.

Consult a Healthcare Professional

If home remedies and over-the-counter treatments fail to improve your nail fungus or if the infection is severe or causing discomfort, consult a healthcare professional. A dermatologist or podiatrist can assess your condition, prescribe stronger antifungal medications if necessary, and recommend additional treatment options such as oral antifungal medications or laser therapy.

FAQs

How long does it take to treat nail fungus effectively?

The duration of nail fungus treatment can vary depending on several factors, including the severity of the infection, the type of treatment used, and individual response to therapy. Over-the-counter antifungal treatments may require several weeks or months of consistent use to achieve noticeable improvement, while prescription medications or professional treatments like laser therapy may yield faster results. It’s essential to follow the recommended treatment regimen and be patient, as nail fungus can be stubborn to treat and may require ongoing maintenance to prevent recurrence.

Can nail fungus spread to other parts of the body or to other people?

Yes, nail fungus can spread to other nails on the same person’s body and can also spread to other individuals. Fungi thrive in warm, moist environments, making areas like locker rooms, showers, and swimming pools common sources of infection. To prevent the spread of nail fungus, avoid sharing personal items like towels, socks, and shoes, practice good hygiene, wear protective footwear in communal areas, and disinfect nail tools regularly. If you suspect you have nail fungus, seek treatment promptly to minimize the risk of spreading the infection to others.

Are there any lifestyle changes that can help prevent nail fungus?

Yes, several lifestyle changes can help reduce the risk of developing nail fungus. These include keeping nails clean, dry, and trimmed, wearing breathable footwear made of natural materials, avoiding tight-fitting shoes and socks, and practicing good foot hygiene. Additionally, minimize exposure to environments where fungal infections are common, such as public swimming pools, gyms, and communal showers. If you frequent these areas, consider wearing protective footwear like flip-flops or sandals to prevent contact with contaminated surfaces. By incorporating these habits into your daily routine, you can lower your risk of developing nail fungus and maintain healthy nails.

Final Thought

Taking care of nail fungus requires patience, consistency, and a multi-faceted approach. By maintaining good hygiene, trimming nails properly, choosing appropriate footwear, applying antifungal treatments, trying home remedies, practicing prevention, and seeking professional guidance when needed, you can effectively manage nail fungus and restore the health and appearance of your nails over time. Remember that results may vary depending on the severity of the infection and individual response to treatment, so stay proactive and persistent in your efforts to combat nail fungus.


Nail Care Essentials: A Guide to Caring for Acrylic Nails

Acrylic nails are a popular choice for those seeking long-lasting and durable manicures. However, proper care is essential to maintain their appearance and integrity. Whether you’re a seasoned acrylic nail enthusiast or considering getting them for the first time, understanding how to care for them is crucial. In this comprehensive guide, we’ll walk you through the essential steps to keep your acrylic nails looking fabulous and in top condition.

The Ultimate Guide: How to Take Care of Acrylic Nails

Avoid Excessive Moisture

While acrylic nails are durable, prolonged exposure to moisture can weaken them and cause lifting. To prevent this, wear gloves while doing dishes, cleaning, or swimming. If your nails do get wet, gently pat them dry with a soft towel and avoid soaking them for extended periods.

Keep Nails Hydrated

Despite avoiding excessive moisture, it’s essential to keep your natural nails hydrated to maintain their health and prevent them from becoming brittle. Apply cuticle oil regularly to the nail beds and surrounding skin to nourish and moisturize. This helps prevent cracking and lifting around the cuticles, prolonging the lifespan of your acrylic nails.

Be Gentle with Your Nails

Acrylic nails are strong, but they’re not indestructible. Avoid using your nails as tools for tasks like opening cans or scratching off stickers, as this can cause them to chip or break. Instead, use appropriate tools for these tasks to prevent damage to your acrylics.

Regular Maintenance

To keep your acrylic nails looking their best, schedule regular maintenance appointments with your nail technician. This typically involves filling in the growth gap at the base of the nails every 2-3 weeks to maintain their shape and appearance. Additionally, if you notice any lifting or damage to your acrylics between appointments, don’t hesitate to seek professional help to avoid further issues.

Protect Your Nails

Apply a clear topcoat or nail polish to your acrylic nails to protect them from chipping and scratching. This not only enhances their appearance but also adds an extra layer of protection against daily wear and tear. Be sure to use non-acetone nail polish remover when changing nail colors to avoid weakening the acrylics.

Avoid Harsh Chemicals

Certain chemicals found in household cleaning products, such as acetone and bleach, can weaken acrylic nails and cause them to lift or become discolored. Wear gloves when using these products to protect your nails, or better yet, delegate cleaning tasks to minimize exposure.

Know When to Remove Them

While acrylic nails can last several weeks with proper care, it’s essential to know when it’s time to remove them. If you notice significant lifting, breakage, or signs of infection (such as redness or swelling around the nail beds), it’s best to have them professionally removed to prevent further damage to your natural nails.

FAQs

Can I use regular nail polish on acrylic nails?

Yes, you can use regular nail polish on acrylic nails. However, it’s essential to use a non-acetone nail polish remover when changing colors to avoid weakening the acrylics. Additionally, applying a clear topcoat or nail polish can help protect the acrylics from chipping and scratching, enhancing their longevity.

How often should I moisturize my acrylic nails?

It’s recommended to moisturize your acrylic nails and surrounding skin daily to keep them hydrated and prevent drying or cracking. Use a cuticle oil or moisturizing cream and massage it into the nail beds and cuticles to nourish and moisturize.

Can I do household chores with acrylic nails?

While acrylic nails are durable, it’s best to avoid using them as tools for tasks like opening cans or scrubbing surfaces. Prolonged exposure to harsh chemicals found in household cleaning products can weaken acrylic nails and cause them to lift or become discolored. If you must do chores, wear gloves to protect your nails from damage.

Final Thought

By following these tips, you can ensure that your acrylic nails remain beautiful and well-maintained for weeks to come. With proper care and attention, you can enjoy the long-lasting benefits of acrylic nails without compromising the health of your natural nails. So, flaunt those flawless fingertips with confidence and style!

Learn How to Permanently Remove Facial Hair

Facial hair can be a source of frustration for many individuals, leading them to seek permanent solutions for its removal. While various temporary methods exist, such as shaving, waxing, and threading, these techniques offer only temporary results and may require frequent maintenance. For those looking for a more permanent solution, several methods can effectively remove facial hair. In this comprehensive guide, we’ll explore different permanent hair removal options and provide insights into their effectiveness and safety.

Achieving Smooth Skin

Laser Hair Removal

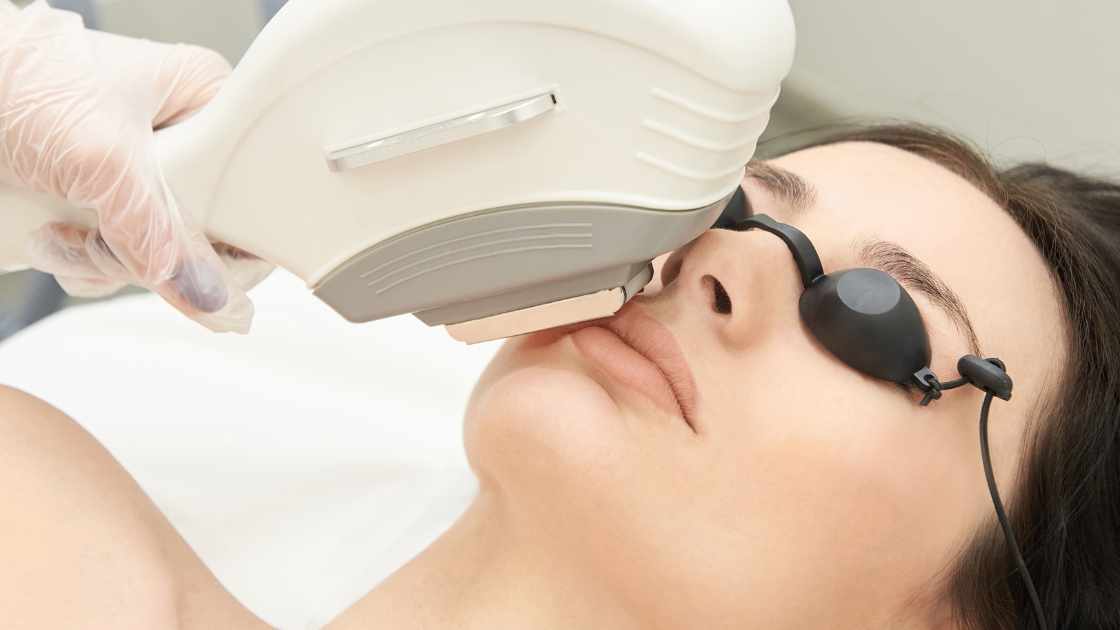
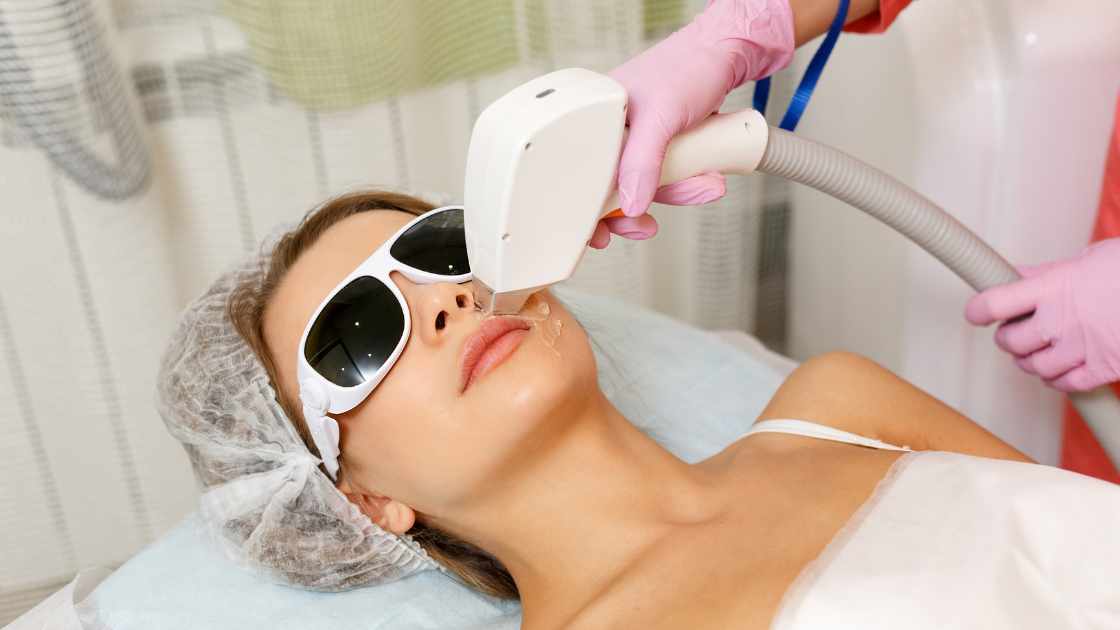
Laser hair removal is a popular and effective method for permanently reducing facial hair. This procedure involves using a concentrated beam of light to target and destroy the hair follicles, inhibiting future hair growth. Laser hair removal is safe for most skin types and can be performed on various areas of the face, including the upper lip, chin, and cheeks.

During the procedure, a trained technician will administer the laser pulses to the treatment area, typically causing minimal discomfort. Multiple sessions are usually required to achieve optimal results, as hair grows in different stages and the laser is most effective during the active growth phase. While laser hair removal offers long-lasting results, it may not completely eliminate all hair, and occasional maintenance sessions may be necessary.

Electrolysis

Electrolysis is another permanent hair removal technique that works by destroying the hair follicles using a small electric current. Unlike laser hair removal, which targets multiple follicles simultaneously, electrolysis treats each follicle individually, making it suitable for small, precise areas like the eyebrows or upper lip.

During an electrolysis session, a fine probe is inserted into the hair follicle, and a mild electrical current is applied to destroy the follicle’s growth center. Over time, repeated treatments result in permanent hair removal. While electrolysis is highly effective, it can be time-consuming and may cause discomfort during the procedure. However, advancements in technology have made electrolysis more comfortable and efficient than ever before.

Prescription Medications

For individuals with hormonal imbalances or medical conditions contributing to excess facial hair growth, prescription medications may offer a solution. Medications such as oral contraceptives, anti-androgens, or topical creams containing eflornithine hydrochloride can help reduce facial hair growth by regulating hormone levels or inhibiting hair follicle activity.

Before considering prescription medications for facial hair removal, it’s essential to consult with a healthcare professional to determine the underlying cause of the excessive hair growth and evaluate the potential risks and benefits of treatment. Additionally, prescription medications may take time to produce noticeable results and may not be suitable for everyone.

FAQs

Is laser hair removal a permanent solution for facial hair?

Yes, laser hair removal is a permanent solution for reducing facial hair. This procedure targets hair follicles with concentrated light, inhibiting future hair growth. While multiple sessions may be required for optimal results, many individuals experience long-lasting hair reduction.

What is electrolysis, and does it permanently remove facial hair?

Electrolysis is a method of permanently removing facial hair by destroying hair follicles with a small electric current. Unlike laser hair removal, which targets multiple follicles simultaneously, electrolysis treats each follicle individually. With repeated sessions, electrolysis can provide permanent hair removal results.

Can prescription medications permanently remove facial hair?

Prescription medications may help reduce facial hair growth, especially for individuals with hormonal imbalances or medical conditions contributing to excess hair growth. Medications such as oral contraceptives, anti-androgens, or topical creams can regulate hormone levels or inhibit hair follicle activity, leading to long-term hair reduction. However, it’s essential to consult with a healthcare professional to determine the most suitable treatment approach.

Final Thought

Permanently removing facial hair requires careful consideration of the available options and individual preferences. Laser hair removal and electrolysis are highly effective methods for achieving long-term hair reduction, while prescription medications may be beneficial for addressing hormonal imbalances contributing to excessive hair growth. Consulting with a qualified dermatologist or licensed practitioner can help you determine the most suitable permanent hair removal solution based on your unique needs and circumstances. With the right approach, you can achieve smooth, hair-free skin and boost your confidence for years to come.

Can You Get Laser Hair Removal While Pregnant

Pregnancy is a time of significant changes in a woman’s body, and many expectant mothers may find themselves questioning the safety of various beauty and skincare procedures. One common concern is whether it’s possible to undergo laser hair removal while pregnant. In this article, we’ll explore the key considerations and provide informative answers to help you make an informed decision.

Laser Hair Removal and Pregnancy: What You Need to Know

Understanding Laser Hair Removal

Laser hair removal is a popular cosmetic procedure that uses concentrated beams of light to target and destroy hair follicles, preventing future hair growth. While the procedure is generally considered safe for most individuals, the question of its safety during pregnancy arises due to the potential risks associated with exposing the developing fetus to laser energy.

Medical Professionals’ Perspective

According to the American College of Obstetricians and Gynecologists (ACOG) and many dermatologists, the safety of laser hair removal during pregnancy is not conclusively established. While there is no definitive evidence suggesting harm to the fetus, most experts recommend erring on the side of caution and postponing elective cosmetic procedures until after childbirth.

Risks and Concerns

The primary concern with laser hair removal during pregnancy revolves around the potential absorption of laser energy by the skin and its impact on the developing fetus. Although the risk is considered minimal, the lack of comprehensive studies and ethical challenges in conducting such research on pregnant women make it difficult to provide a definitive answer.

Hormonal Changes and Skin Sensitivity

Pregnancy brings about hormonal fluctuations that can affect the skin’s sensitivity. Some women may experience heightened skin sensitivity or changes in pigmentation, which could impact the efficacy of laser hair removal and increase the likelihood of adverse reactions. It’s essential to communicate openly with your healthcare provider and the laser technician about any changes in your skin during pregnancy.

Alternative Hair Removal Methods

Given the uncertainty surrounding the safety of laser hair removal during pregnancy, many healthcare professionals recommend opting for alternative hair removal methods that are considered safe for expectant mothers. These may include shaving, waxing, or using depilatory creams, all of which have minimal risks associated with pregnancy.

FAQs

Can you get laser hair removal while pregnant?

The safety of laser hair removal during pregnancy is not definitively established. While there is no conclusive evidence of harm to the fetus, most healthcare professionals advise against undergoing the procedure during pregnancy due to the potential risks associated with laser energy absorption by the skin.

Are there any known risks of laser hair removal during pregnancy?

The primary concern revolves around the absorption of laser energy by the skin, which could pose a minimal risk to the developing fetus. Additionally, hormonal changes during pregnancy may impact skin sensitivity and pigmentation, potentially affecting the efficacy of the procedure. Due to these uncertainties, experts recommend postponing laser hair removal until after childbirth.

What are safe alternatives to laser hair removal during pregnancy?

For expectant mothers, opting for alternative hair removal methods is recommended. Shaving, waxing, and using depilatory creams are considered safer options during pregnancy, as they pose minimal risks to both the mother and the developing fetus. It is advisable to consult with healthcare providers and dermatologists to choose the most suitable and low-risk method based on individual circumstances.

Final Thought

In conclusion, the safety of laser hair removal during pregnancy remains a topic of debate within the medical community. While there is no concrete evidence of harm to the fetus, caution is advised due to the lack of comprehensive studies on pregnant women. If you are pregnant and considering laser hair removal, it is crucial to consult with your healthcare provider and a qualified dermatologist to weigh the potential risks and benefits based on your individual circumstances. Ultimately, prioritizing the well-being of both the mother and the developing fetus should guide any decisions regarding cosmetic procedures during pregnancy.

Does At Home Laser Hair Removal Work

Laser hair removal has become an increasingly popular method for achieving smooth, hair-free skin. Traditionally performed in professional settings, advancements in technology have brought the possibility of at-home laser hair removal devices. The burning question on many minds is, “Does at-home laser hair removal really work?”

Understanding At-Home Laser Hair Removal

At-home laser hair removal devices use the same basic principle as professional systems. They emit concentrated beams of light that target the melanin in hair follicles, damaging them and inhibiting future hair growth. However, the efficacy of at-home devices can vary based on factors such as the device’s technology, the user’s skin and hair type, and adherence to usage instructions.

The Pros and Cons

Pros

Convenience: One of the main advantages is the convenience of using these devices at home. Users can schedule sessions at their own pace, avoiding the need for salon appointments.
Cost-Effective: While professional laser treatments can be expensive, at-home devices are often a more economical option in the long run.

Cons

Effectiveness may vary: At-home devices may not be as powerful as those used in professional settings, potentially leading to less effective results.
Safety concerns: Without the expertise of a trained professional, there is a risk of misuse, which could result in skin damage or ineffective treatment.

Factors Influencing Effectiveness

Skin and Hair Type: At-home laser devices may not be suitable for all skin and hair types. Individuals with lighter skin and darker hair tend to experience better results.
Consistency: Success with at-home laser hair removal requires consistent and proper usage. Skipping sessions or not following guidelines can impact the effectiveness of the treatment.

Tips for Success

Choose the Right Device: Research and select an at-home laser hair removal device that is FDA-approved and suited for your skin and hair type.
Patch Test: Before full application, perform a patch test to ensure your skin reacts well to the device.
Follow Instructions: Adhere strictly to the manufacturer’s guidelines regarding treatment intervals and session duration.

FAQs

Does at-home laser hair removal really work?

Yes, at-home laser hair removal can be effective for many individuals. However, the results may vary based on factors such as skin type, hair color, and the specific device used. It’s crucial to choose a reputable, FDA-approved device and follow the instructions consistently for optimal results.

Is at-home laser hair removal safe?

At-home laser hair removal can be safe when used correctly. Always conduct a patch test before full application to ensure your skin reacts well. Follow the manufacturer’s guidelines closely, and be cautious with settings to prevent skin damage. If in doubt, consulting a dermatologist is advisable.

How long does it take to see results with at-home laser hair removal?

Patience is key with at-home laser hair removal. While some users may see a reduction in hair growth after a few sessions, significant results often take several weeks or months. Consistency is crucial, so adhere to the recommended treatment schedule for the best outcome.

Final Thought

In conclusion, at-home laser hair removal can work for some individuals, offering a convenient and cost-effective solution. However, it is essential to manage expectations and understand that results may vary. For those seeking optimal and safer outcomes, consulting with a professional for in-office laser hair removal remains a viable and reliable option.


Learn How To Wear A Thin Sports Headband For Guys

Sports headbands have become a popular accessory for both style and functionality, providing a practical solution to keeping sweat at bay during workouts while also adding a trendy touch to your athletic attire. Among the various types available, thin sports headbands for guys offer a sleek and minimalist look that complements a wide range of styles. In this guide, we’ll explore the steps on how to wear a thin sports headband for guys with comfort and flair.

A Guide on How to Wear a Thin Sports Headband for Guys

Step 1: Choose the Right Headband

Before delving into the wearing process, it’s essential to select a headband that suits your style and preferences. Opt for a thin sports headband made from moisture-wicking and breathable materials, ensuring it effectively absorbs sweat during intense workouts. Additionally, choose a color that complements your workout gear or personal style.

Step 2: Start with Clean Hair

For optimal comfort and hygiene, make sure your hair is clean before putting on the headband. This will prevent any oils or residues from affecting the headband’s grip and will also contribute to a more enjoyable workout experience.

Step 3: Adjust the Size

Thin sports headbands typically come in one-size-fits-all designs, but it’s important to adjust the band to your head size for a snug fit. Place the headband around your forehead and adjust it until it sits comfortably, ensuring it’s not too tight or too loose.

Step 4: Position on the Forehead

Position the thin sports headband along your forehead, just above your eyebrows. Ensure that the band is straight and lies flat against your skin to prevent discomfort during movement. The goal is to keep the headband secure without causing headaches or slipping during physical activity.

Step 5: Style According to Preference

While the primary purpose of a thin sports headband is functionality, you can also style it to suit your preferences. Some guys prefer a centered placement, while others may angle it slightly to one side for a more casual look. Experiment with different placements to find the style that complements your overall aesthetic.

Step 6: Combine with Other Accessories

Feel free to combine your thin sports headband with other workout accessories such as wristbands or athletic sunglasses to enhance your overall look. Coordinate colors and styles to create a cohesive and polished appearance.

FAQs

How do I choose the right thin sports headband for guys?

When selecting a thin sports headband for guys, consider the material and design. Opt for a headband made from moisture-wicking and breathable materials to effectively manage sweat during workouts. Ensure it fits comfortably around your head and choose a color that complements your workout gear or personal style. Look for bands with anti-slip features to keep them securely in place during physical activity.

What is the correct way to position a thin sports headband on the forehead?

To ensure optimal comfort and functionality, position the thin sports headband along your forehead, just above your eyebrows. Make sure it sits flat against your skin without being too tight or too loose. The goal is to keep it secure without causing discomfort or impeding your movements. Experiment with placement to find the style that suits you best – whether centered or slightly angled to one side.

Can I wear a thin sports headband with other workout accessories?

Yes, you can definitely combine a thin sports headband with other workout accessories to enhance your overall athletic style. Consider pairing it with wristbands or athletic sunglasses that coordinate in color and style. This combination not only adds a polished look to your workout attire but also provides practical benefits, such as keeping sweat off your face and ensuring you stay focused on your fitness routine.

Final Thought

Wearing a thin sports headband for guys is a simple yet effective way to elevate your athletic style while keeping sweat in check during intense workouts. By choosing the right headband, adjusting the size for a snug fit, and experimenting with different styles, you can confidently incorporate this accessory into your fitness routine. Stay comfortable, stylish, and focused on your workout with the perfect thin sports headband for your needs.


Learn How To Make Shiny Shoes Dull

While shiny shoes can be a stylish choice for formal occasions or a polished look, there are times when a matte finish is preferred for a more casual or rugged appearance. Whether you want to tone down the shine of new shoes or transform your glossy pair into a more laid-back style, this guide will walk you through the steps to make your shiny shoes dull.

Transforming Shine to Matte: A Guide on How to Make Shiny Shoes Dull

Materials Needed

Soft cloth or sponge
Mild soap or leather cleaner
Fine-grit sandpaper or emery board
Leather conditioner
Matte shoe polish or cream

Step 1: Clean the Shoes

Start by cleaning your shiny shoes thoroughly to remove any dirt, dust, or existing polish. Use a soft cloth or sponge dampened with mild soap or a suitable leather cleaner. Gently wipe the entire surface of the shoes, paying attention to seams and crevices.

Step 2: Lightly Sand the Surface

To dull the shine, use fine-grit sandpaper or an emery board. Lightly sand the entire surface of the shoes, focusing on areas with the most shine. Be gentle and use a circular motion to avoid damaging the material. This process will help break down the top layer of polish or finish, creating a more matte appearance.

Step 3: Condition the Leather

After sanding, apply a quality leather conditioner to moisturize and nourish the leather. This step is crucial to prevent the material from becoming dry or damaged during the dulling process. Follow the instructions on the conditioner, allowing it to be absorbed into the leather for optimal results.

Step 4: Apply Matte Shoe Polish or Cream

To achieve a matte finish, invest in a matte-specific shoe polish or cream. Apply a small amount to a soft cloth or applicator and rub it onto the shoes in a circular motion. Ensure an even application across the entire surface. Matte polishes typically contain less wax than their glossy counterparts, contributing to the desired dull effect.

Step 5: Buff for a Finished Look

After applying the matte polish, allow it to dry according to the product instructions. Once dry, use a clean, dry cloth to gently buff the shoes. This will remove any excess polish and enhance the matte finish.

FAQs

Can I make my shiny shoes dull without damaging them?

Yes, you can safely make your shiny shoes dull by following a careful process. Begin by cleaning the shoes with a soft cloth and mild soap. Use fine-grit sandpaper or an emery board to lightly sand the surface, focusing on glossy areas. After sanding, apply a leather conditioner to prevent dryness. Finally, use a matte shoe polish or cream for a subdued finish. Be gentle throughout the process to avoid damaging the material.

What materials do I need to make my shiny shoes dull?

To make your shiny shoes dull, you will need a soft cloth or sponge, mild soap or leather cleaner, fine-grit sandpaper or an emery board, leather conditioner, and matte shoe polish or cream. These materials will help you clean, gently sand, moisturize, and finish your shoes with a matte effect.

Can I use regular shoe polish to achieve a matte finish?

While regular shoe polish can add shine, it may not provide the matte finish you desire. To make your shoes dull, opt for a matte-specific shoe polish or cream. These products are formulated with fewer waxes, resulting in a matte appearance. Applying a matte polish ensures that you achieve the desired effect without compromising the overall quality and appearance of your shoes.

Final Thought

Transforming shiny shoes into a dull matte finish is a straightforward process that can give your footwear a more relaxed and versatile look. With a few simple steps and the right materials, you can achieve the desired effect while keeping your shoes in great condition. Experiment with different levels of shine to find the perfect matte finish for your style preferences.


Learn How Long To Wait After Pedicure To Wear Shoes

After a relaxing pedicure, the last thing you want to do is smudge your freshly painted toenails by putting on shoes too soon. Patience is key to maintaining the pristine appearance of your pedicure. In this article, we’ll delve into how long you should wait after a pedicure before slipping on your favorite pair of shoes.

Timing Matters: How Long to Wait After a Pedicure to Wear Shoes

The General Rule

As a general guideline, it’s advisable to wait at least 2 hours after a pedicure before putting on closed-toe shoes. This timeframe allows ample time for the nail polish to dry and harden, reducing the risk of smudging or denting the freshly painted nails.

Factors Affecting Drying Time

Type of Nail Polish

Traditional nail polishes typically take longer to dry compared to quick-dry or gel polishes. Adjust your wait time accordingly based on the type of polish used during your pedicure.

Application Technique

Thin, even coats of nail polish tend to dry faster than thick, gloopy layers. If multiple coats were applied, consider giving each layer enough time to dry before applying the next.

Topcoat Usage

Applying a clear topcoat can expedite the drying process and provide an extra layer of protection against smudges. If a topcoat was used, it might reduce the overall waiting time.

Tips to Speed Up Drying

While waiting is essential, you can take a few measures to speed up the drying process:

Use a Fan or Blow Dryer

Gentle air circulation can help dry your nail polish faster. Use a fan or set a blow dryer on the lowest, cool setting and aim it at your toes for a few minutes.

Dip Nails in Cold Water

After about 15-20 minutes of initial drying, dip your painted toenails in cold water for a few minutes. The cool temperature can harden the polish.

Quick-Dry Sprays or Drops

Consider using quick-dry sprays or drops designed to accelerate the drying process. Follow the product instructions for optimal results.

FAQs

How long should I wait after a pedicure before wearing closed-toe shoes?

It’s generally recommended to wait at least 2 hours after a pedicure before putting on closed-toe shoes. This allows sufficient time for the nail polish to dry and harden, reducing the risk of smudging or denting.


Can I expedite the drying process after a pedicure?

Yes, you can speed up the drying process by using a fan or blow dryer on a low, cool setting, dipping your painted toes in cold water after the initial drying period, or using quick-dry sprays or drops designed for nail polish.


Does the type of nail polish affect the waiting time after a pedicure?

Yes, the type of nail polish matters. Traditional polishes generally take longer to dry compared to quick-dry or gel polishes. Adjust your waiting time based on the specific type of polish used during your pedicure.

Final Thought

While the anticipation of showcasing your newly pedicured toes in stylish shoes is understandable, waiting is crucial to ensure your nail polish sets properly. By adhering to the general rule of waiting at least 2 hours and considering the factors influencing drying time, you can confidently put on your shoes without the fear of compromising your perfectly polished pedicure. Remember, a little patience goes a long way in maintaining the beauty of your freshly painted toenails.


Learn How To Get A Discount At Lifetime Fitness

Maintaining a healthy lifestyle is a priority for many individuals, and fitness enthusiasts often seek premium gym experiences. Life Time Fitness, with its state-of-the-art facilities and comprehensive wellness programs, is a sought-after fitness destination. If you’re looking to join Life Time Fitness while being mindful of your budget, explore these strategies to secure discounts and make your fitness journey more affordable.

Unlocking Savings: How to Get a Discount at Life Time Fitness

Explore Membership Promotions

Life Time Fitness frequently offers membership promotions, especially during certain times of the year or during special events. Keep an eye on their official website, social media pages, and local advertisements for any ongoing promotions. These may include discounted initiation fees, reduced monthly rates, or additional perks for new members.

Inquire About Corporate Memberships

Many companies have partnerships with fitness centers to provide discounted memberships to their employees. Check with your employer or Human Resources department to see if there’s a corporate partnership with Life Time Fitness. Corporate memberships often come with exclusive discounts, making it a cost-effective way to access premium fitness facilities.

Take Advantage of Trial Memberships

Before committing to a full membership, explore Life Time Fitness through trial memberships or guest passes. Sometimes, these trial offers are accompanied by special discounts for those who decide to sign up after experiencing the facilities. It’s a great way to test the waters and potentially secure a reduced rate.

Ask About Family or Household Memberships

If you’re joining with family members or friends, inquire about family or household memberships. Life Time Fitness may offer group discounts for multiple individuals signing up together. This can significantly reduce the overall cost per person, making it a more budget-friendly option for everyone involved.

Utilize Student or Military Discounts

Life Time Fitness often extends special discounts to students and military personnel. If you fall into either of these categories, be sure to ask about available discounts and provide the necessary documentation to secure reduced rates. This is a common practice in the fitness industry to support these specific communities.

Check with Insurance Providers

Certain health insurance providers offer fitness-related incentives and discounts as part of their wellness programs. Contact your insurance provider to inquire about any partnerships or benefits they may have with fitness centers like Life Time. You might be eligible for discounted rates or reimbursement for your fitness expenses.

Negotiate Membership Fees

Don’t be afraid to negotiate. Speak with a representative at Life Time Fitness and express your genuine interest in joining. In some cases, they may be willing to customize a membership plan that suits your needs and budget. Negotiation can be a powerful tool to secure a discounted rate, especially if you’re committing to a longer-term membership.

FAQs

How can I find ongoing promotions and discounts at Life Time Fitness?

Keep an eye on Life Time Fitness’s official website, social media pages, and local advertisements for information on current promotions. The gym often runs special offers, including reduced initiation fees, discounted monthly rates, or additional perks for new members during certain periods or events.


Are there specific discounts available for students or military personnel at Life Time Fitness?

Yes, Life Time Fitness frequently extends special discounts to students and military personnel. If you fall into either category, inquire about available discounts and provide the necessary documentation to secure reduced rates. This is a common practice in the fitness industry to support these specific communities.


Can I negotiate membership fees at Life Time Fitness?

Yes, don’t hesitate to negotiate. Speak with a representative at Life Time Fitness, express your genuine interest in joining, and discuss your budget. In some cases, they may be willing to customize a membership plan or offer a discounted rate, especially if you’re committing to a longer-term membership. It’s worth exploring to find a plan that suits your needs and financial preferences

Final Thought

Embarking on a fitness journey at Life Time Fitness doesn’t have to break the bank. By staying informed about promotions, exploring membership options, and utilizing discounts available through various channels, you can achieve your health and wellness goals while keeping your budget intact. Remember to ask questions, be proactive, and take advantage of the many avenues available to secure a discounted membership at Life Time Fitness.