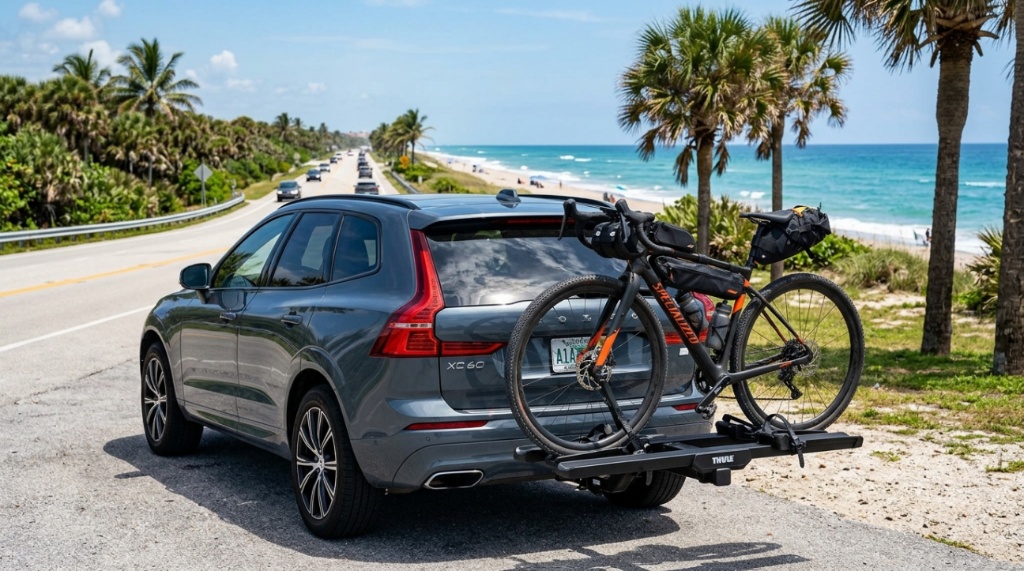
Florida’s flat terrain, coastal breezes, and year-round riding weather make it one of the best states for cycling. But getting your bike to the trailhead, beach path, or state park without a dependable carrier can turn a promising day into a frustrating one. The challenge is that heat, humidity, salt air, and long-distance driving between cities put unique stress on bike racks. You need something that won’t rust, wobble, or fail when you need it most. This guide walks through exactly what to look for when choosing a reliable hitch bike rack for FL conditions, covering fit, durability, security, and real-world usability so you can buy with confidence.
Why a Hitch Rack Makes Sense for Florida Riders
Hitch-mounted racks attach to a receiver on your vehicle, typically a 1.25-inch or 2-inch class hitch. Compared to trunk straps or roof mounts, they offer a better balance of stability, ease of loading, and security. For Florida drivers, the advantages are especially relevant.
First, hitch racks keep bikes off your vehicle’s paint and glass, which matters when you’re dealing with intense sun and frequent afternoon thunderstorms. Second, they don’t add significant height, so you won’t worry about low clearance in parking garages or under tree canopies common in Florida neighborhoods. Third, most hitch racks allow you to tilt or swing the rack away from the vehicle, giving you access to your trunk or tailgate—useful when you need to grab a cooler or beach gear.
Class and Receiver Size Matter
Before buying anything, check your vehicle’s hitch receiver size. A 1.25-inch receiver limits you to lighter-duty racks, typically carrying two bikes at most. A 2-inch receiver opens up heavier-duty options that can carry four bikes and offer more stability. If you drive a crossover or SUV, you likely have a 2-inch receiver. If you drive a sedan or smaller crossover, you may have a 1.25-inch receiver. Adapters exist, but they add wobble and reduce weight capacity—avoid them if possible.
Key Features to Look For in a Florida-Ready Rack
Not all hitch racks handle Florida’s environment equally well. Focus on these specific features to ensure long-term reliability.
Corrosion Resistance
Salt air along the coast accelerates rust on cheap steel components. Look for racks with aluminum frames, stainless steel hardware, or a high-quality powder-coated finish. Aluminum resists corrosion far better than bare steel, and stainless bolts won’t seize up after months of exposure to humidity. If you plan to park near the beach regularly, this is not optional—it’s essential.
Weight Capacity and Bike Compatibility
Check the rack’s per-bike weight limit, not just the total capacity. Many racks list a 35-pound limit per bike, which is fine for most road and hybrid bikes. But if you ride an e-bike or a heavy mountain bike, you’ll need a rack rated for 50–60 pounds per bike. Also consider frame geometry. Step-through frames, fat tires, and fenders can be tricky to secure. Look for racks with adjustable cradles and wheel straps that accommodate a range of tire widths.
Locking Mechanisms
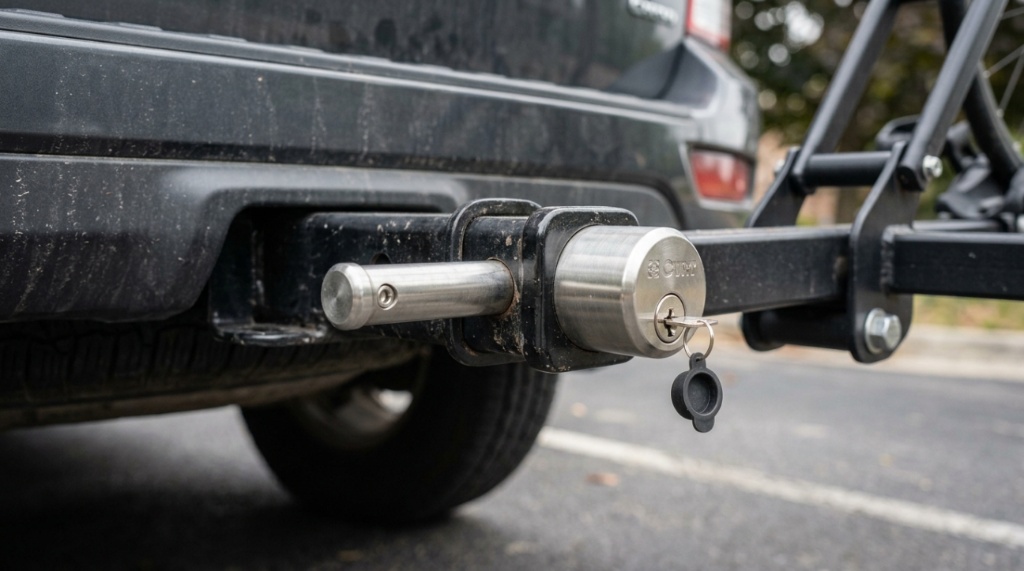
Bike theft is a real concern, especially in popular trailhead parking lots and beach access points. A reliable rack should include a locking hitch pin to secure the rack to your vehicle, plus integrated cable locks or locking arm mechanisms to secure the bikes themselves. Some racks use a single locking arm that covers all bikes; others have individual locks. For Florida’s busy tourist areas, individual locks offer better peace of mind, Before hitting the road with your gear, make sure you know how to clean up any unexpected messes by learning .
Platform Style vs. Hanging Style: Which Is Better?
Two main designs dominate the hitch rack market: platform racks and hanging racks. Each has trade-offs that matter depending on how you ride.
Platform Racks
Platform racks support bikes by their wheels, so the frame never touches the rack. This is ideal for carbon frames, step-through frames, and bikes with unusual geometry. Bikes sit upright and stable, and most platform racks tilt away from the vehicle for trunk access. The downsides are higher cost, heavier weight, and more storage space required when not in use.
Hanging Racks
Hanging racks support bikes by the top tube. They’re lighter, cheaper, and fold flat for easy storage. However, they don’t work well with step-through frames, women’s frames, or bikes with non-standard top tubes unless you use an adapter bar. They also allow bikes to sway more during transit, which can lead to frame scratches if bikes touch each other. For Florida’s mix of casual cruisers and performance bikes, platform racks are generally the safer choice.
Key Considerations for Florida’s Driving Conditions
Florida isn’t just about heat and salt. Long stretches of highway, sudden downpours, and frequent stop-and-go traffic all affect how a rack performs.
Highway Stability
At highway speeds, wind resistance and vibration can cause cheaper racks to wobble. Look for racks with anti-wobble mechanisms, such as a bolt-on hitch tightener or a cam-lock system. These reduce movement at the hitch connection point, which protects both your bikes and your vehicle’s hitch. A rack that wobbles excessively can also cause the bikes to shift, potentially damaging derailleurs or brake rotors.
Heat and UV Exposure
Florida sun is intense. Plastic components, rubber straps, and locking mechanisms degrade faster under prolonged UV exposure. Choose racks with UV-stabilized plastics and replaceable straps. If you leave your rack on your vehicle year-round, inspect the straps and locking mechanisms every few months. Cracking or fading rubber is a sign that replacement is needed before a failure occurs.
Rain and Sudden Storms
Afternoon thunderstorms are a Florida staple. While most bikes can handle rain, the rack’s moving parts need to shed water effectively. Look for sealed bearings in folding mechanisms and drainage holes in any enclosed channels. Rust on folding joints can make it difficult to tilt or fold the rack after a few wet seasons.
How to Match a Rack to Your Bike Type
Your bike type determines which rack features are non-negotiable. Here’s a practical breakdown.
Road and Gravel Bikes
These bikes often have carbon frames and delicate components. A platform rack with padded wheel cradles is the safest option. Avoid hanging racks that put pressure on the top tube. Also, check that the wheel straps are long enough for wider gravel tires.
Mountain Bikes
Mountain bikes are heavier and may have dropper posts, wide handlebars, and knobby tires. Platform racks with adjustable wheel chocks work best. Make sure the rack’s weight capacity covers your bike’s actual weight, including any accessories like water bottles or saddle bags.
E-Bikes
E-bikes are heavy—often 50–70 pounds. You need a rack rated for that weight per bike. Most standard racks are not suitable. Look for e-bike-specific racks with reinforced arms, wider wheel cradles, and a higher total capacity. Also, consider how you’ll lift the bike onto the rack. Some racks have a ramp accessory that makes loading easier.
Kids’ Bikes and Cruisers
Kids’ bikes have smaller wheels and shorter wheelbases. Some platform racks struggle to secure them because the wheel cradles are spaced too far apart. Look for racks with adjustable wheel chocks that can be moved closer together. Cruisers with step-through frames are best on platform racks, as hanging racks won’t work without an adapter.
Installation and Daily Use Tips
Getting the rack on your vehicle is only half the battle. Proper installation and daily habits extend the life of your rack and keep your bikes safe.
Step-by-Step Installation Basics
- Insert the rack’s shank into the hitch receiver. Make sure it’s fully seated.
- Secure the hitch pin or bolt. Tighten according to the manufacturer’s torque specifications.
- If the rack has an anti-wobble mechanism, tighten it until the rack doesn’t move when you push on it.
- Load your bikes, starting with the heaviest bike closest to the vehicle.
- Secure each bike with the provided straps or arms. Double-check that all contact points are snug.
- Test the rack by shaking it gently. If anything moves, tighten before driving.
Daily Maintenance for Florida Conditions
Rinse the rack with fresh water after trips to the beach. Salt residue accelerates corrosion, and a quick rinse removes most of it. Lubricate folding joints and locking mechanisms with a silicone-based spray every few months. Inspect straps for cracks or fraying before each long trip. If you notice rust on any steel components, treat it early with a rust converter before it spreads.
Common Mistakes to Avoid
Even a high-quality rack can fail if used incorrectly. Avoid these common errors.
Exceeding Weight Limits
Every rack has a maximum total weight and a per-bike weight limit. Exceeding either can cause the rack to bend, crack, or detach while driving. If you’re unsure of your bike’s weight, weigh it on a bathroom scale before loading.
Ignoring Hitch Fit
A loose fit at the hitch connection is the most common cause of wobble and noise. If your rack doesn’t come with an anti-wobble device, buy a separate hitch tightener. Never use tape or shims as a substitute—they can slip and cause the rack to detach.
Blocking License Plates or Lights
Florida law requires that your license plate and taillights remain visible. Many racks obscure them when loaded. Use a hitch-mounted accessory that extends your plate and lights, or choose a rack with an integrated light bar. Getting pulled over for an obscured plate is an easy way to ruin a ride day.
Leaving the Rack On Unnecessarily
Leaving a rack on your vehicle year-round exposes it to more sun, rain, and salt than necessary. If you only ride on weekends, remove the rack between trips. This reduces wear and also improves fuel economy slightly by reducing drag.
Budget vs. Long-Term Value
Hitch racks range from under $150 to over $800. The cheapest options are usually hanging-style racks with basic straps and no locking features. They work for occasional use with lightweight bikes, but they won’t hold up well to Florida’s environment or heavy bikes.
Mid-range racks, typically $300–$500, offer platform designs, better corrosion resistance, and integrated locks. These are the sweet spot for most riders who use their rack a few times per month.
Premium racks above $500 add features like tool-free tilting, integrated ramps, higher weight capacities, and premium materials. If you own an e-bike or plan to carry bikes regularly for years, the extra cost is justified by durability and convenience.
Consider the cost of replacing a cheap rack every two years versus buying a quality rack once. Over five years, the premium rack often ends up cheaper—and it won’t fail you on the way to a ride.
Frequently Asked Questions
Can I use a hitch rack on a car with a 1.25-inch receiver?
Yes, but your options are limited. Most 1.25-inch racks carry only two bikes and have lower weight limits. If you have a 2-inch receiver, you’ll have access to heavier-duty racks with more features. Avoid adapters if possible, as they add wobble and reduce stability.
How do I keep my bikes from swaying on the highway?
Use a rack with an anti-wobble mechanism at the hitch connection. Also, secure the bikes tightly with all straps and arms. If your rack has a locking arm that covers the frame, make sure it’s fully engaged. Swaying is usually caused by a loose hitch fit or under-tightened straps.
Are platform racks worth the extra cost?
For most riders, yes. Platform racks are more stable, work with more bike types, and reduce the risk of frame damage. They’re especially worth it if you have a carbon frame, an e-bike, or a step-through bike. The main downsides are higher cost and heavier weight.
How often should I replace the straps on my bike rack?
Inspect straps before every trip. Replace them if you see cracks, fraying, or significant fading. In Florida’s UV-heavy environment, straps may need replacement every 1–2 years even with regular use. Most manufacturers sell replacement straps separately.
Can I leave my hitch rack on my vehicle in Florida?
You can, but it’s not ideal. Constant sun and salt exposure will accelerate wear on straps, plastic components, and any steel parts. If you leave it on, rinse it regularly and inspect it monthly. Removing it between trips extends its lifespan significantly.
Conclusion
Finding a reliable hitch bike rack for FL doesn’t have to be complicated if you focus on the right priorities. Corrosion resistance, weight capacity, locking features, and highway stability are the four pillars of a rack that will serve you well in Florida’s unique conditions. Platform racks are the safest bet for most riders, especially if you own an e-bike, a carbon road bike, or a step-through cruiser. Match the rack to your bike type, install it properly, and maintain it with regular rinsing and lubrication. Avoid the common mistakes of exceeding weight limits, ignoring hitch fit, and blocking your license plate. With the right rack, you’ll spend less time worrying about your gear and more time enjoying Florida’s incredible riding opportunities.