
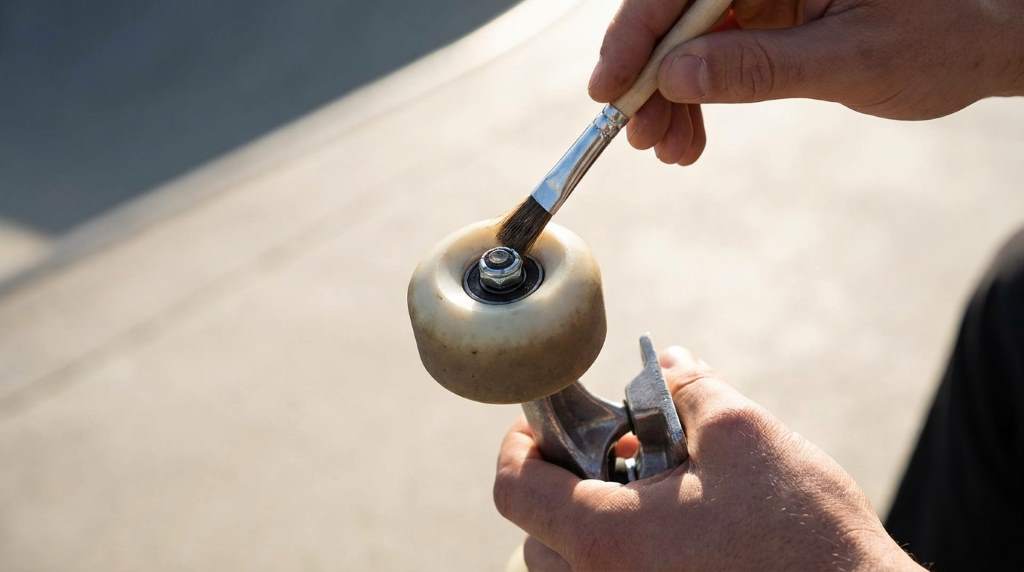
Prevent skate wheel lock-up by maintaining bearings, matching wheels to terrain, and controlling debris before every ride. In Austin, rough pavement and sudden surface changes make proper wheel setup especially important, while even 10 mph can create a hard stop.
Regular inspections also matter because one contaminated bearing can disrupt an otherwise smooth setup. Before choosing new bearings, this Bronson bearings review can help you understand bearing performance factors.
Key Takeaways
- Check wheels, bearings, and axle hardware before every session.
- Match wheel hardness and diameter to Austin’s riding surface.
- Remove gravel, leaves, dust, and moisture before they reach bearings.
- Avoid abrupt braking that overloads one wheel or bearing.
- Replace damaged bearings instead of trying to revive unsafe ones.
- Choose predictable riding areas with enough room to react.
Understand Why Skate Wheels Lock Up
Wheel lock-up happens when a wheel suddenly stops rotating while your board keeps moving forward. Usually, friction, debris, bearing damage, or excessive braking creates the problem.
However, the trigger can also come from a wheel rubbing the deck or hardware. Therefore, identifying the exact cause matters more than simply replacing the wheels.
Austin presents several surface challenges for skaters, including cracked pavement, rough patches, loose debris, and abrupt transitions. Consequently, your setup must tolerate changing traction without producing unpredictable stops.
Wheel lock-up can also happen after riding through moisture or dirty surfaces. Water carries contaminants toward bearings, while grit can interfere with smooth bearing rotation.
Start troubleshooting by lifting the board and spinning every wheel independently. A healthy wheel should rotate smoothly without grinding, wobbling, or stopping immediately.
Look for These Warning Signs
- Grinding sounds: The bearing may contain dirt or internal damage.
- Side-to-side movement: Loose hardware or worn components may cause instability.
- Uneven rotation: Contamination or bearing wear may restrict movement.
- Wheel rubbing: Misalignment can create sudden resistance during turns.
- Flat spots: Aggressive braking may reduce predictable wheel performance.
Address these signs before riding faster or attempting technical maneuvers. A small mechanical problem can become a sudden lock-up under greater load.
Choose Wheels That Suit Austin Surfaces
Wheel selection strongly affects how your board responds to rough or inconsistent pavement. Softer wheels generally absorb surface imperfections better, while harder wheels favor smoother riding areas.
For mixed urban surfaces, prioritize predictable traction and controlled rolling over maximum slide performance. You can also review reliable hitch bike rack guidance when transporting skating equipment by vehicle.
Wheel diameter also changes how your board handles cracks and small obstacles. Larger wheels typically roll over minor imperfections more easily, although they can alter acceleration and board height.
Therefore, select a wheel size based on your riding style, deck clearance, and typical terrain. Never assume that the most popular wheel automatically suits your local route.
Match Wheel Hardness to Terrain
Soft wheels can provide greater grip and smoother feedback across rough pavement. They also tend to reduce vibration when surfaces contain small cracks or coarse aggregate.
Hard wheels can work well on smooth concrete and dedicated skatepark surfaces. However, they may feel less forgiving when loose material interrupts the riding line.
If you regularly switch between streets and skateparks, consider a balanced wheel setup. This approach can provide adequate control without forcing one wheel type into every environment.
Inspect and Maintain Bearings Before Riding
Bearings deserve attention because contamination can increase rolling resistance without obvious external damage. First, remove visible dirt around the bearing shields and wheel area.
Next, spin each wheel and listen carefully for grinding, clicking, or inconsistent rotation. If one wheel behaves differently, investigate it before riding.
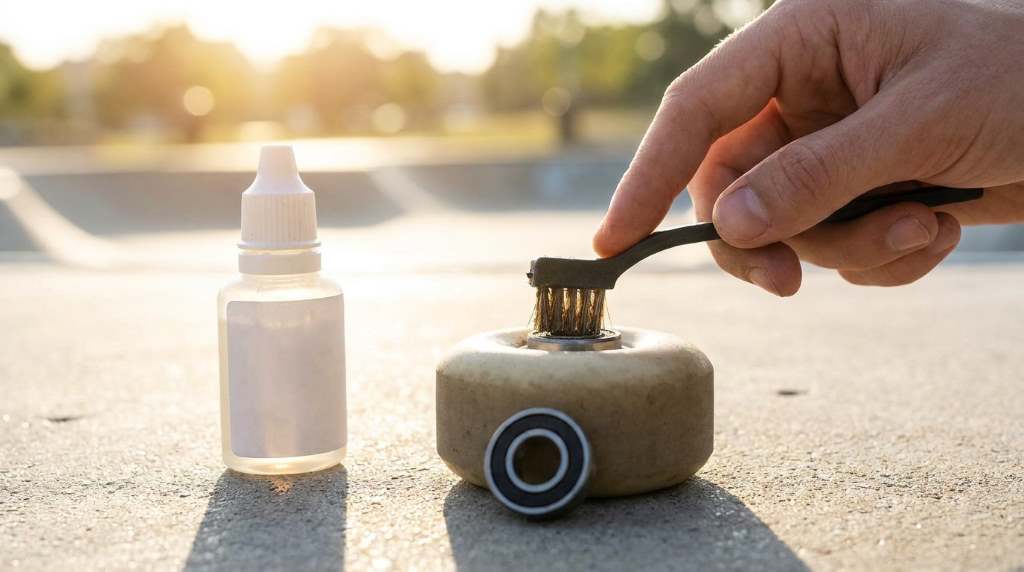
Use a bearing cleaner designed for skateboard bearings when maintenance requires deeper cleaning. After cleaning, use an appropriate bearing lubricant and avoid excessive oil.
Too much lubricant can attract dust and create another source of contamination. Conversely, running bearings completely dry can increase friction and accelerate wear.
Follow a Simple Bearing Check
- Remove the wheel and inspect both bearing faces.
- Spin the bearing gently and listen for abnormal sounds.
- Check for rust, cracks, contamination, or rough rotation.
- Clean serviceable bearings using suitable maintenance products.
- Lubricate lightly and reinstall the wheel correctly.
- Replace bearings that remain rough after proper maintenance.
Never rely on cleaning when a bearing shows structural damage or persistent roughness. Replacement usually provides a safer and more predictable solution.
Keep Debris Away From Your Wheels
Loose gravel represents one of the simplest causes of sudden wheel resistance. Austin’s outdoor riding areas can collect dust, leaves, sand, and other small debris.
Before starting, scan the riding line for obvious obstacles and loose material. Then choose a cleaner path whenever the route provides an alternative.
Pay special attention after storms because wet debris can cling to wheels and bearings. Also avoid puddles when possible because moisture can accelerate corrosion inside bearings.
Carry a small cleaning cloth during longer sessions when conditions remain dusty. A quick inspection between locations can prevent contamination from becoming a mechanical problem.
Use a Pre-Ride Surface Check
- Scan for gravel: Loose stones can interrupt wheel rotation instantly.
- Check cracks: Avoid approaching deep cracks at excessive speed.
- Watch moisture: Wet surfaces can reduce predictable traction.
- Inspect leaves: Organic debris can hide stones and surface damage.
- Check transitions: Sudden pavement changes can upset wheel contact.
This simple routine takes less than a minute but can prevent avoidable surprises. More importantly, it encourages you to read the surface before committing to speed.
Control Braking Without Causing Lock-Up
Abrupt braking can force wheels beyond their available traction and create a skid. Instead, apply pressure progressively and keep your body balanced over the board.
When slowing down, avoid suddenly shifting all your weight onto one wheel. Smooth pressure allows the wheels to maintain more consistent contact with the surface.
Foot braking can also provide better speed control when conditions become unpredictable. Practice it slowly before using it during faster rides or crowded sessions.
Carving can reduce speed without demanding an immediate stop from the wheels. However, maintain sufficient space because turns require room and predictable traction.
Practice Controlled Deceleration
Begin on a clean, level surface where you can stop comfortably. Gradually increase speed while practicing smooth braking pressure and controlled body positioning.
Then repeat the exercise on slightly rougher pavement at lower speeds. This progression helps you understand how your wheels respond before conditions become demanding.
Never practice emergency braking near pedestrians, vehicles, or other skaters. Choose an open area with clear escape space and predictable surface conditions.
Check Axles, Spacers, and Wheel Alignment
Wheel lock-up does not always originate inside the bearing. Incorrect axle tension can squeeze components together and restrict wheel rotation.
Check whether each wheel spins freely after tightening the axle nut. The wheel should remain secure without developing excessive resistance.
Spacers can help maintain proper bearing alignment when your setup requires them. Install components according to your wheel and bearing configuration rather than guessing.
Also inspect the wheel for damage around its core and riding surface. A distorted wheel can create inconsistent contact and unusual resistance.
Use This Hardware Checklist
- Axle nuts: Keep them secure without excessive tightening.
- Bearings: Confirm proper seating inside each wheel.
- Spacers: Use compatible spacers when your setup requires them.
- Speed washers: Check their position during wheel installation.
- Wheel cores: Inspect for cracks, deformation, or damage.
After making adjustments, perform a controlled spin test before riding. This quick check can reveal installation problems immediately.
Choose Safer Riding Locations in Austin
Your location can influence wheel behavior as much as your equipment. Dedicated skate facilities generally provide more predictable surfaces than poorly maintained pedestrian areas.
Austin Parks and Recreation currently lists two operated skate parks, including Mabel Davis District Park and Heath Eiland and Morgan Moss BMX Skate Park. Choose appropriate facilities when practicing technical skills or controlled maneuvers.
When transporting your board and accessories, keep your equipment organized and protected. A practical sports setup can reduce the chance of damaged wheels, bearings, or hardware before the session begins.
Also respect local restrictions and posted facility rules before riding. Some Austin public areas restrict skateboarding, while certain facilities prohibit skateboards entirely.
Prioritize Predictable Surfaces
Dedicated skate areas can offer clearer lines for practicing acceleration, turning, and controlled stopping. Nevertheless, inspect the surface before every session because conditions can change.
For unfamiliar locations, start slowly and test traction before increasing speed. This approach gives your wheels time to reveal how they respond to the surface.
For additional personal gear guidance, how to wear a sport headband can help with practical riding apparel choices.
Build a Pre-Ride Lock-Up Prevention Routine
A repeatable inspection routine reduces dependence on memory and helps catch small problems early. Keep the process short enough that you will actually perform it before riding.
Start by checking wheel rotation, bearing noise, and axle tension. Next, inspect the riding surface and remove any obvious debris from your immediate path.
Then test your brakes and turning response at low speed. If anything feels different from your normal setup, stop and investigate.
Use the One-Minute Routine
- Spin all four wheels and compare their rotation.
- Listen for grinding, clicking, or unusual bearing noise.
- Check axle tightness and wheel side-to-side movement.
- Inspect wheels for cracks, flat spots, and severe wear.
- Scan the first section of pavement for loose debris.
- Perform a slow roll before committing to speed.
Consistency matters more than complexity because small inspections prevent larger mechanical surprises. Make this routine automatic whenever you pick up your board.
Know When Replacement Makes More Sense
Some components can tolerate cleaning and adjustment, while others need replacement. Persistent grinding, corrosion, cracks, or severe wheel deformation should not receive temporary fixes.
Likewise, replace wheels with significant flat spots when braking behavior becomes unpredictable. Fresh wheels can restore more consistent contact when wear has changed the original profile.
Do not continue riding simply because a component still moves. A component can function poorly while appearing usable during a quick visual inspection.
When uncertain, compare the damaged component with a new one of the same specification. Noticeable differences in rotation, shape, or fit usually justify further inspection.
What To Do If a Wheel Locks During a Ride
If a wheel suddenly locks, reduce speed without making an aggressive steering correction. Keep your weight centered and move toward a clear stopping area.
Once stopped, inspect the wheel before continuing. Look for gravel, bearing damage, axle interference, or wheel deformation.
If the problem returns immediately, end the session and repair the board. Repeated lock-up indicates an unresolved mechanical or surface-related problem.
Do not test a questionable wheel at higher speed to see whether it improves. Controlled troubleshooting on a stationary board provides a safer diagnostic approach.
Final Checklist for Reliable Rolling
Preventing skate wheel lock-up requires equipment maintenance, terrain awareness, and controlled riding technique. None of these measures works well when you ignore the others.
Before every Austin session, inspect your bearings, wheels, hardware, and immediate riding surface. Then begin slowly and increase speed only after your board feels predictable.
For practical apparel preparation, wear a thin sports headband guidance can complement your riding setup.
Most importantly, treat unexpected wheel behavior as a warning rather than an inconvenience. Inspect the board, correct the cause, and only return when the setup performs normally.
Conclusion
Preventing skate wheel lock-up in Austin starts with clean bearings, suitable wheels, secure hardware, and thoughtful surface selection. Smooth braking and regular inspections then reduce the chance of sudden traction loss.
Before your next ride, complete the one-minute inspection and test your board at low speed. If you discover worn bearings, damaged wheels, or loose hardware, fix the issue before riding again.
Make this checklist part of every session, and your board will deliver more predictable control across changing Austin surfaces.
FAQs
What causes skate wheels to lock up suddenly?
Debris, damaged bearings, excessive axle tension, wheel rubbing, and abrupt braking commonly cause sudden wheel lock-up.
Can dirty bearings cause a skateboard wheel to stop?
Yes, accumulated dirt can increase friction and interfere with smooth bearing rotation.
Are softer wheels better for rough Austin pavement?
Generally, softer wheels provide better shock absorption and traction across rougher surfaces.
How often should skateboard bearings receive maintenance?
Inspect bearings regularly and service them whenever noise, resistance, contamination, or rough rotation appears.
Should I keep riding after repeated wheel lock-up?
No, repeated lock-up requires inspection and correction before you continue riding.